Using nJAMS Replay#
nJAMS Replay extends nJAMS Server GUI with a context menu that is available from Result list or from Navigation Tree.
Replay context menu#
When you press the right mouse button over an entry of the Result list, the Replay context Menu pops up.
The Replay context menu is also available with regards to an element of the Tree. Press right mouse button over an element of the Tree and the Replay context menu opens in context of the selected Domain Object.
Replay context Menu provides the following actions:
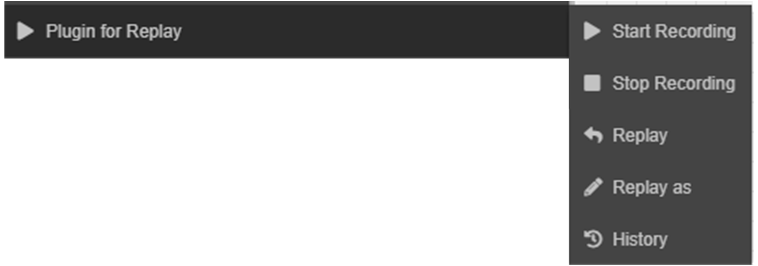
- Start recording:
Start recording turns on the recording of data of the start activity for a starter process. By default recording is enabled. You can enable Start recording with regards to a specific process or you can turn on recording regarding all processes of a domain object.
An icon indicates that recording is enabled:

When the logged in user is permitted to start a Replay, the icon indicates replayable:

- Stop recording:
Stop recording turns off the recording of data. You can disable recording with regards to a specific process or regarding all processes of a domain object.
- Replay:
Replay starts a new process instance based on the selected entry in the Result list. Replay starts the new process instance by using the recorded data of the start activity. If there is no recorded data available, the process instance will be started anyhow, but without any data.
Note
Most starter processes require data to operate successfully. If you execute a starter process without data, the processes execution might fail.
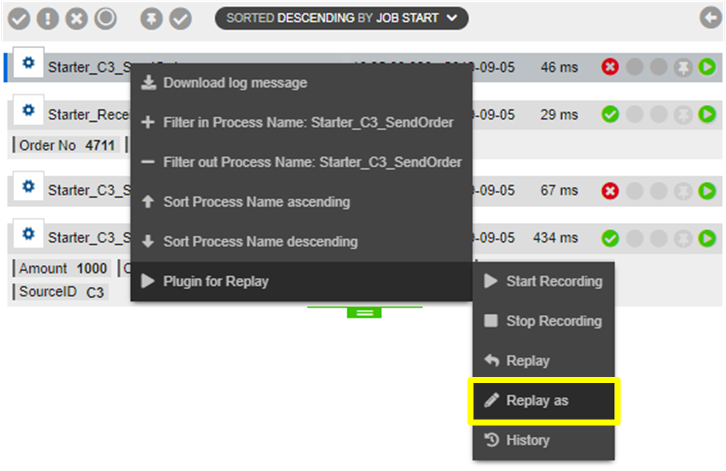
- Replay as:
Replay as allows you to modify recorded data before starting a process instance. When recorded data is available, the data field in Replay as dialog is prefilled with recorded data. You can change this data.
- History:
History provides a list of all Replays with regards to a process instance. You can compare two Replays and check for differences. This might be very useful for you, when you want to compare the input messages of two different Replays.
Start a Replay#
Starting a Replay is easy.
Just select an entry in the Result list and press right mouse button. Select Replay > Replay in the context menu:
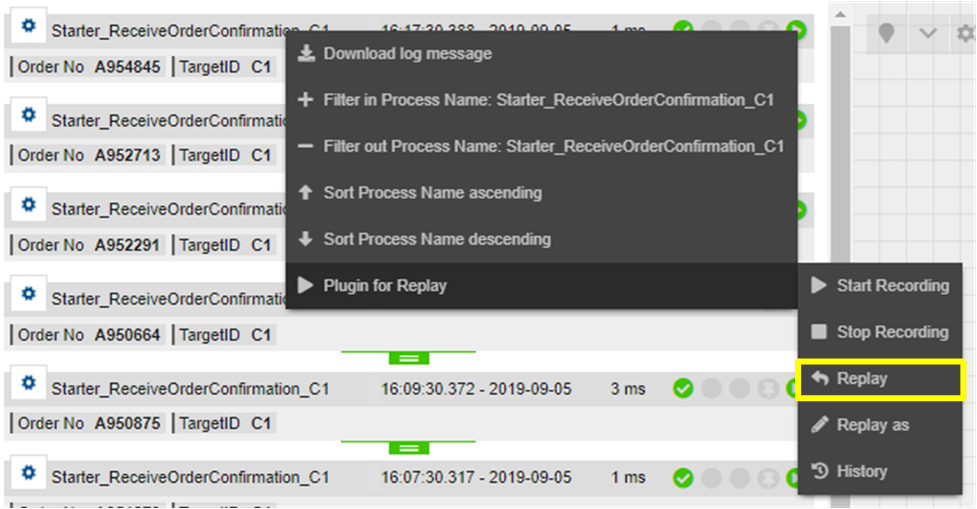
An instance of the selected process will be started instantly.
The example above replayed process “Starter_ReceiveOrderConfirmation_C1”. Refreshing the Result list will show an additional entry for the replayed process:
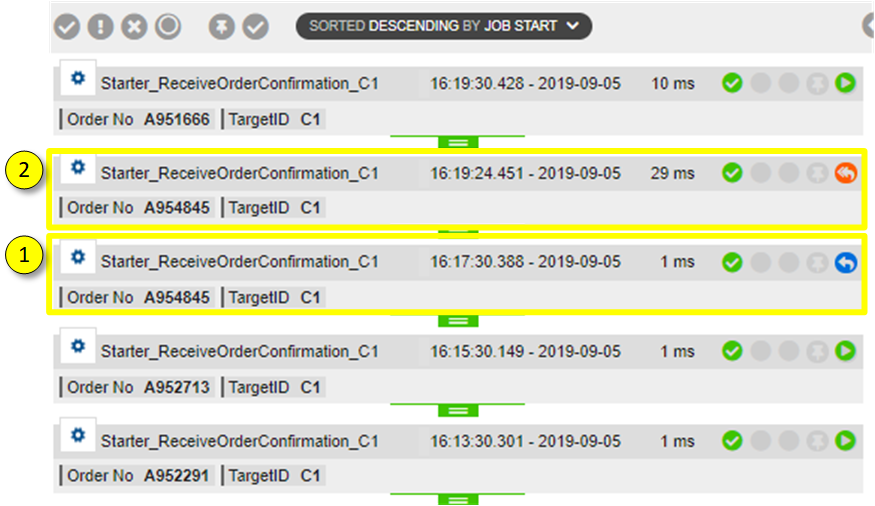
This is the original process execution (replay source)
This is the replayed process (replay target)
Note
You need REPLAY permission to be allowed to start a Replay.
Start a Replay as#
With Replay as you can modify the data before starting the Replay. Select Replay as from the context menu.
Initial situation:
There is a failing process instance due to invalid input data:
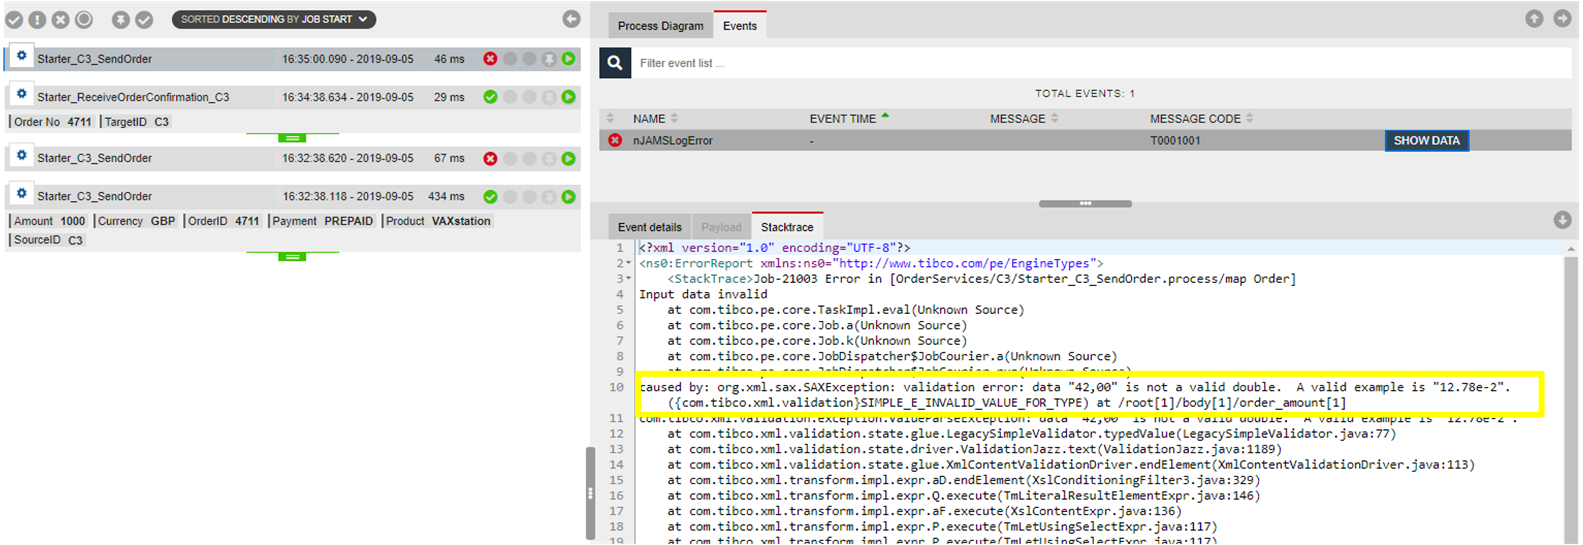
Because the data is invalid, it does make sense to correct the data before you start a Replay. So you start a Replay as:
A dialog pops up and shows recorded data of the start activity. In this case we have a HTTP Receiver that should be retriggered:
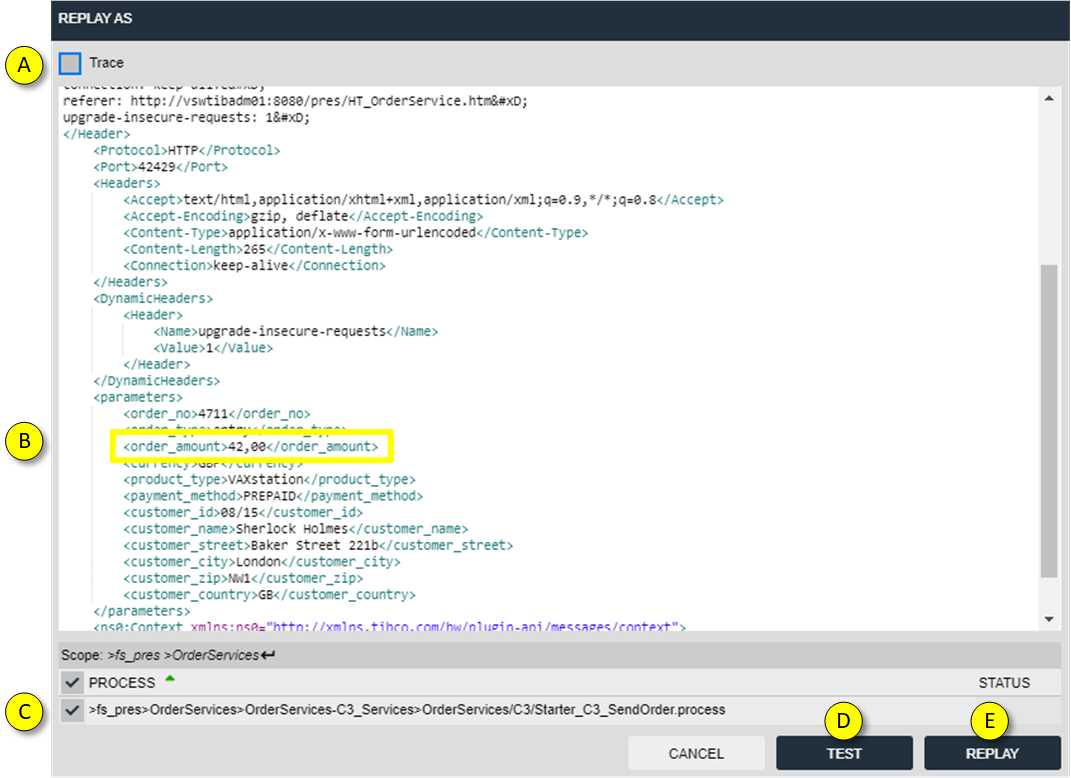
You can modify the data here. For example, you may want to edit the XML message as in (B). Be careful, when editing the message. If the XML is invalid or not well-formed or does not match the expected schema of the start activity, the process execution will fail.
In this scenario the value of element “order_amount” has to be changed from “42,0” to decimal “42.0” in order to be processed correctly.
If you select option “Trace” on the upper left side of the dialog (A), tracing will not only be enabled on all activities of the current starter process but also enabled on all correlated processes. This feature is called “deep trace”. For further information regarding “deep trace”, please consult the nJAMS Server User Guide.
Select where to apply the Replay (C). In this example there is only one process available to get triggered by Replay. For exmaple, if you have a load-balanced scenario, where a process is deployed multiple times on different machines, you can select a process of a specific machine the get started by Replay. If you select two processes, you would start the Replay on both processes.
Test (D) will check, whether the nJAMS Client can be reached to trigger the Replay. The Replay will not be started.
Click on Replay (E) to finally trigger the Replay.
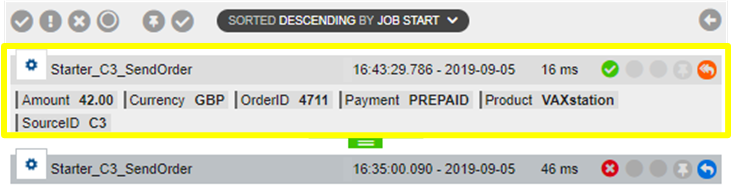
See the new entry in the Result list for the replayed process instance:
Also verify the Replay indicators:
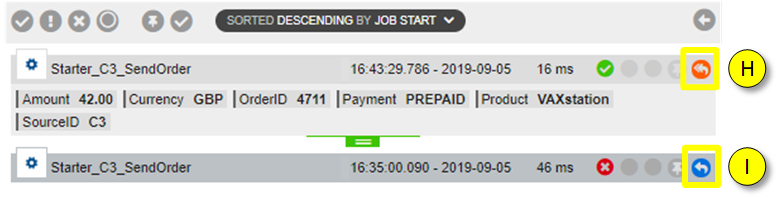
Indicates a “replayed” process instance
Indicates a “replay source” process instance. From this process instance the Replay has been triggered.
Let us have a deeper look inside. In this example the “order_amount” value has been modified and replayed successfully:

See the sequence of the Replay(s)
See the corrected data of the Replay
You can also compare both jobs and see the difference between the failing and the successful execution.

Hold
<ctrl>and select both entries to compare
Start a Replay for sub processes#
You can also start a Replay for sub processes:
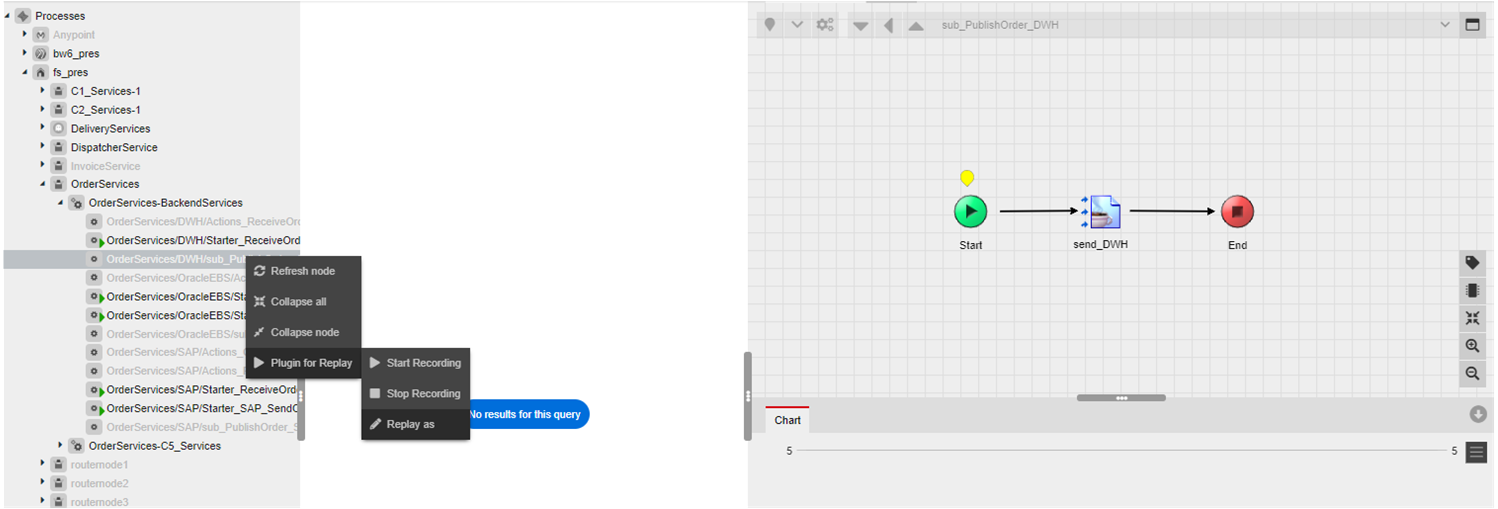
Although inline sub processes are not represented by an entry in the Result list, they can still be replayed. Navigate to the sub process in the Tree, right click over the sub process and select “Replay as”.
In case the start activity of the sub process does not require data, you can trigger the Replay without entering data. But in many cases the start activity requires data. So you have to apply input data.
Start a Batch Replay#
You can select multiple entries from Result list by holding <CTRL> key and selecting entries in Result list.
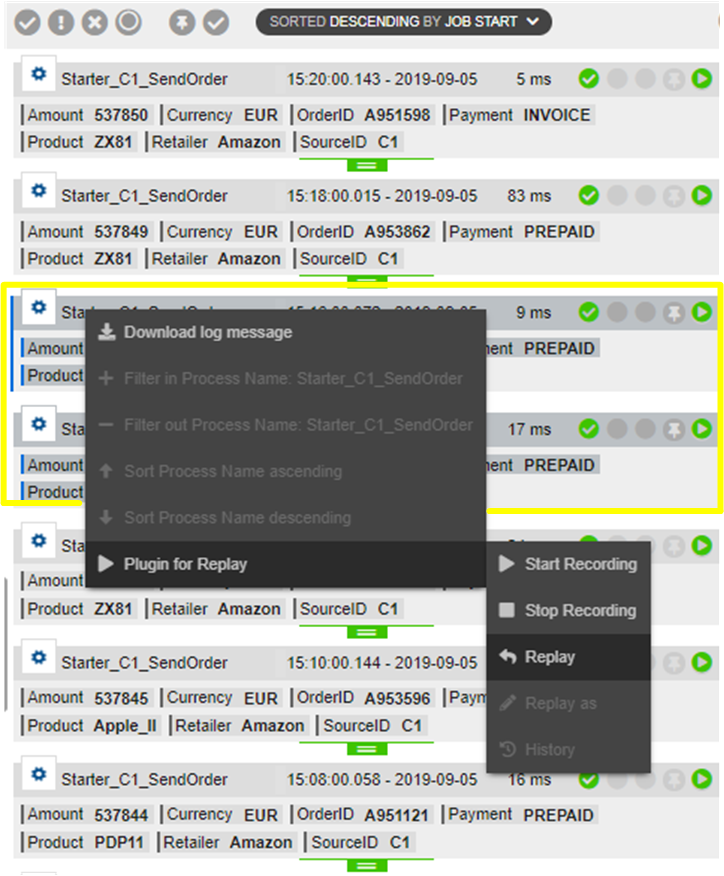
By right-clicking on any of the selected entries you will get the context menu to start a Batch Replay.
See the result:
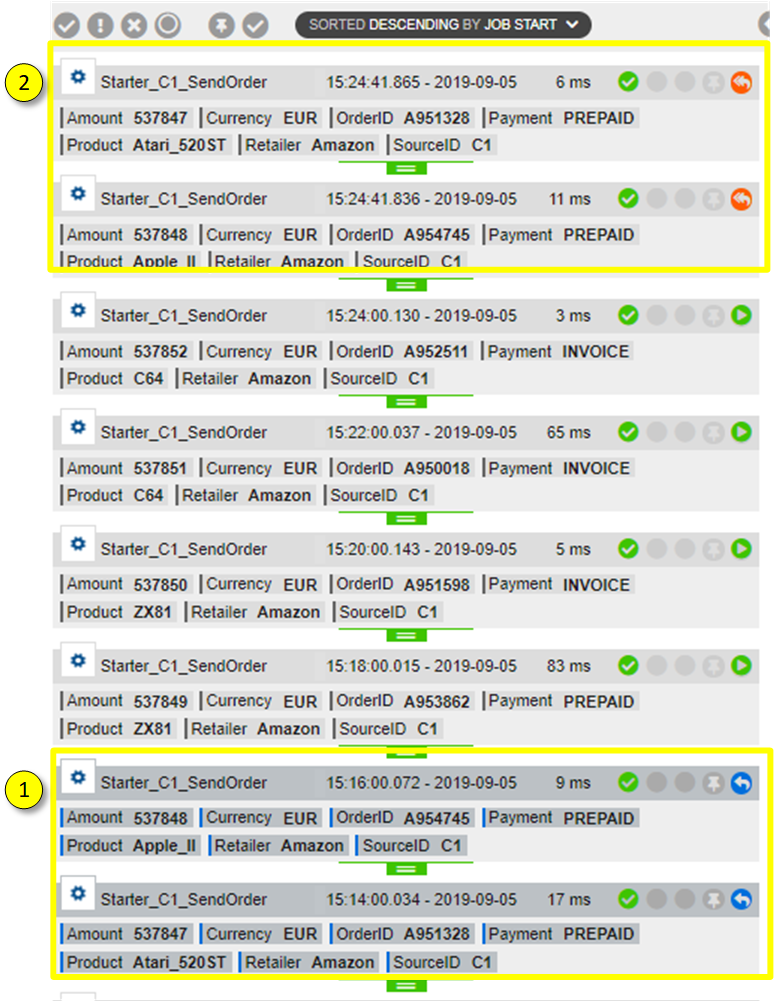
There are two selected entries. The blue icons indicate a replay source.
And there are two replayed entries. The orange icons indicate the replay target.
History#
Replay History shows detailed information about a Replay. The History works like an audit trail in order to give the user full transparency about when a Replay was started, who initiated the Replay, and what were the data the Replay was started with.
Select a main entry and click on “History” in the context menu:
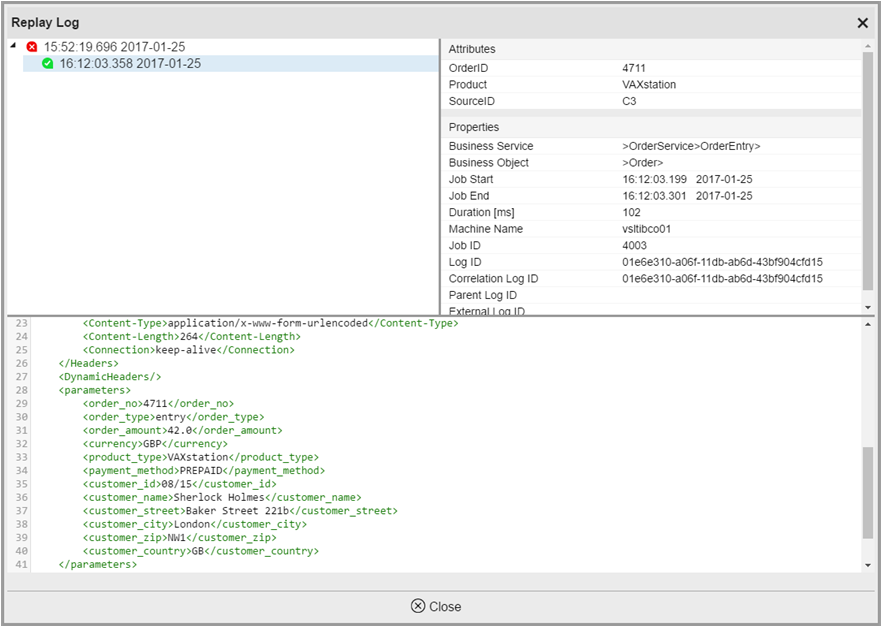
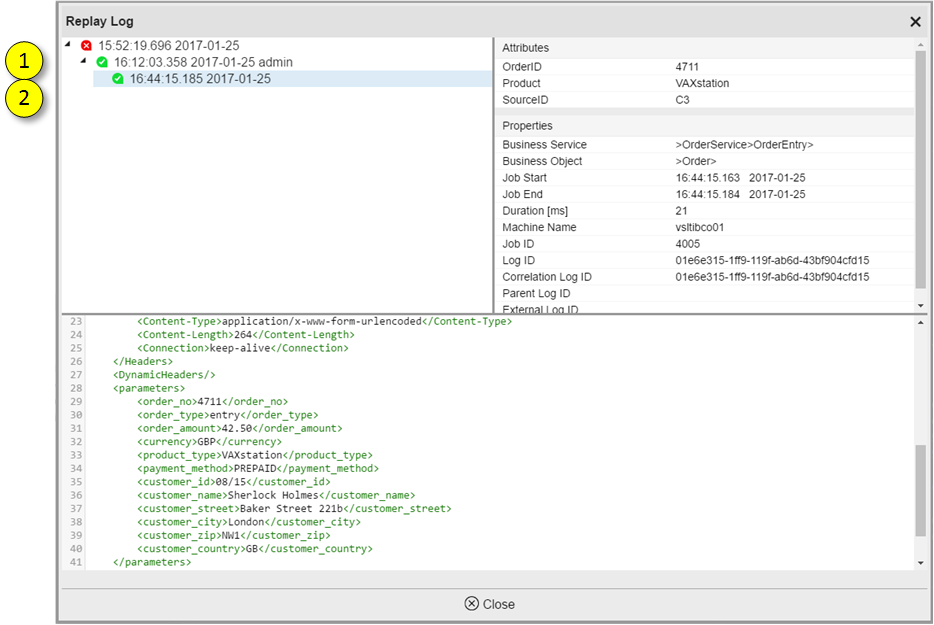
The History dialog shows detailed information about a Replay:
the original main entry including timestamp
any related Replay including timestamp and the username who initiated the Replay
the message that was sent
The following example shows the original process execution and two subsequent Replays afterwards. See (1) and (2). The last entry (2) contains the modified confirmation date:
You can select two entries by holding <ctrl>:
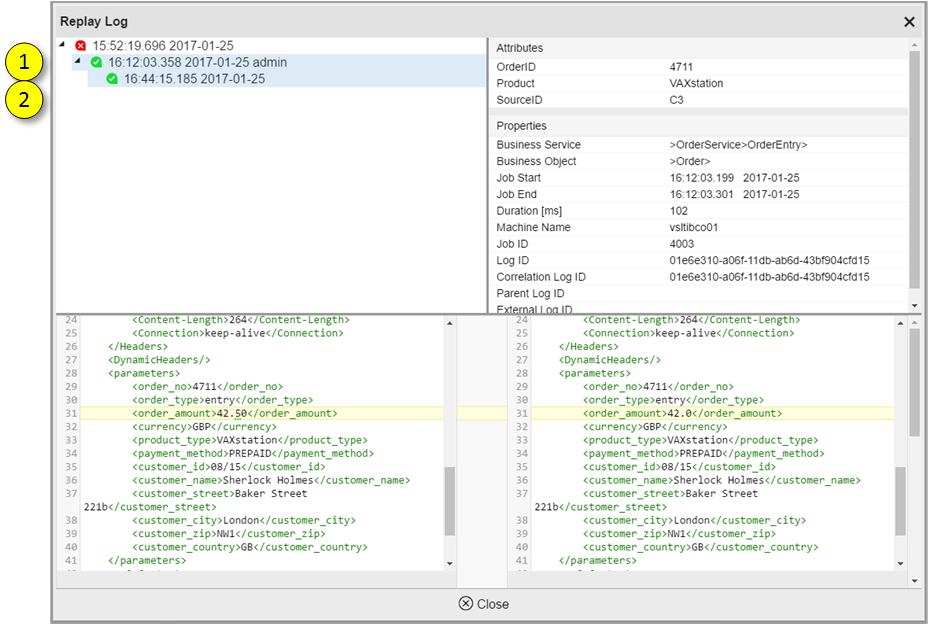
For both entries the input messages are presented side by side. The differences are highlighted with a yellow background color, so you can find any differences between the messages very easily.
Start / Stop recording#
By default, the recording of data is turned on. In some cases it might be useful to turn off recording only for a single process.
You can In context of a Result list entry:
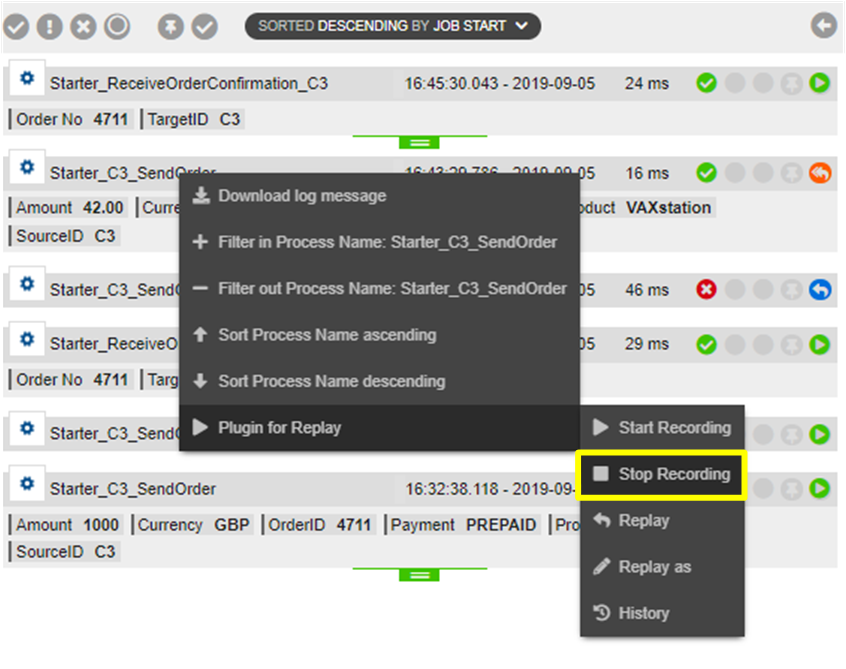
Select an entry from Result list, press right mouse button, and click on “Stop recording” from the context menu. In this example the recording of process “Starter_C3_SendOrder” will be turned off.
From now on Recording is turned off and no recorded data will be available for this process:
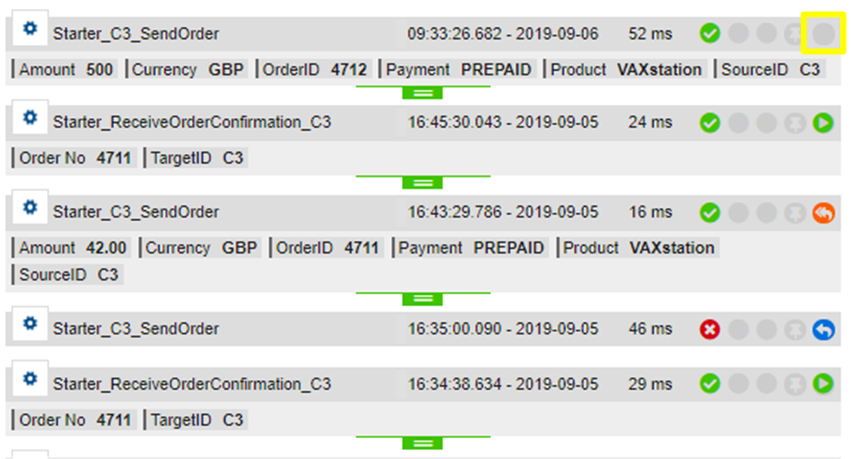
Since recording has been stopped, there is no Replay inidicator.
You can also turn off recording with regards an engine/node element in the Tree:

Select an engine/node from the Tree and click on “Stop recording” in the context menu. In this case all processes of the selected engine are stopped from recording.
Select “Start recording” to turn on recording again.