Installation and configuration using Connector#
Installation#
nJAMS Client for Mule4 is installed either by using the nJAMS Client for Mule4 installer or by editing pom.xml manually.
Using installer#
You can use nJAMS Client for Mule4 installer to install nJAMS Client for Mule4 into your Mule project. nJAMS Client for Mule4 installer has to be made available in Anypoint Studio first, before you can use the installer to add nJAMS Client for Mule4 to your project.
Add nJAMS Client for Mule4 installer to Anypoint Studio:
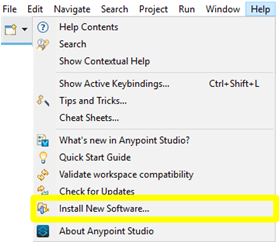
Start Anypoint Studio
Go to Help > Install New Software…
Add a new repository by entering a name for the repository and specifying the following location:
http://p2.integrationmatters.com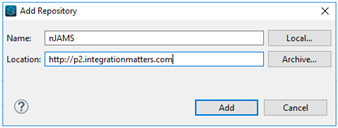
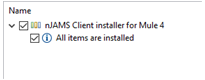
In the folowing dialog select nJAMS Client for Mule4 Eclipse feature and proceed by clicking on Next.
Restart Anypoint Studio and nJAMS Client for Mule4 installer will now be made available in Anypoint Studio.
Install nJAMS Client for Mule4 into your project:
Open a Mule project and right click at the root of your project
Navigate to nJAMS and select Add nJAMS to project.
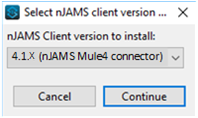
Select the version of nJAMS Client for Mule4 you want to install. It is recommended to use nJAMS Client for Mule4 Connector for the installation. Alternatively you can install the client by using Spring module.
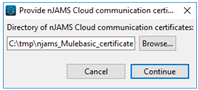
Enter the folder of certificates you downloaded before from your nJAMS Cloud instance. Skip this step, if you want to use nJAMS Client for Mule4 on-premise while using an JMS provider for communication.
Refresh your Mule project. nJAMS Client for Mule4 is now part your Mule project and ready to monitor your Mule application.
nJAMS Client for Mule4 installer adds a reference in
src/main/mule/global.xmlto configuration filenjams.properties. This is the used configuration by nJAMS Client for Mule4.
Manually modifying pom.xml#
It is not required to use the nJAMS Client for Mule4 installer as described before. You can install nJAMS Client for Mule4 also manually by modifying pom.xml as follows:
Start Anypoint Studio and open your Mule project
Edit file
pom.xmlof your Mule project: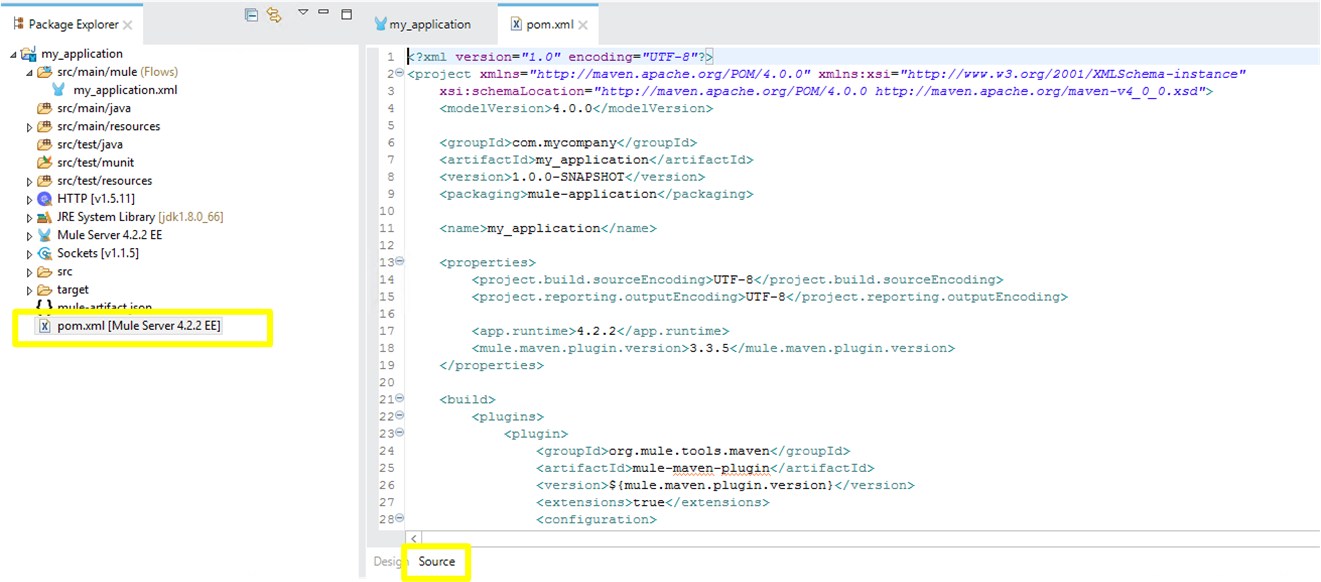
2.1 Add the following content into section configuration of build/plugins/plugin:
<sharedLibraries>
    <sharedLibrary>
        <groupId>com.faizsiegeln.njams</groupId>
        <artifactId>njams-client-mule4</artifactId>
    </sharedLibrary>
</sharedLibraries>
2.2 Add the following content into section repositories:
<repository>
    <id>integrationmatters-repo-release</id>
    <url>https://maven.integrationmatters.com/release</url>
</repository>
2.3 Add the following content into section dependencies:
<dependency>
    <groupId>com.faizsiegeln.njams</groupId>
    <artifactId>njams-client-mule4-extension</artifactId>
    <version>4.1.4</version>
    <classifier>mule-plugin</classifier>
</dependency>
<dependency>
    <groupId>com.faizsiegeln.njams</groupId>
    <artifactId>njams-client-mule4</artifactId>
    <version>4.1.4</version>
</dependency>
2.4 Please make sure you are using recent version of the Mule Maven Plugin, e.g. 3.5.x or higher:
<properties>
    <project.build.sourceEncoding>UTF-8</project.build.sourceEncoding>
    <project.reporting.outputEncoding>UTF-8</project.reporting.outputEncoding>
    <app.runtime>4.2.2-hf2</app.runtime>
    <mule.maven.plugin.version>3.5.4</mule.maven.plugin.version>
</properties>
2.5 Optional: If you want to use JMS (ActiveMQ) as communication layer, please add the following dependency as well:
<!-- https://mvnrepository.com/artifact/org.apache.activemq/activemq-client -->
<dependency>
    <groupId>org.apache.activemq</groupId>
    <artifactId>activemq-client</artifactId>
    <version>5.16.1</version>
</dependency>
2.6 Save file
pom.xml. nJAMS Client for Mule4 is available now within your Mule project: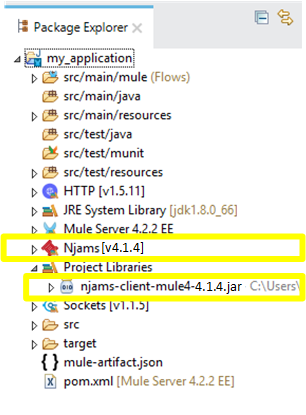
nJAMS Client for Mule4 is now ready for configuration. Follow the next chapter to setup nJAMS Client for Mule4 for different scenarios.
Inline Configuration#
nJAMS Client for Mule4 can be configured for different situations, depending on what you want to use. The nJAMS Client for Mule4 Connector dialog allows you to define the basic settings how nJAMS Client for Mule4 should work, as well as the communication settings depending on your nJAMS instance.
You can create multiple configurations and switch between them according to different purposes. For example, you may want to have a production configuration that allows nJAMS Client for Mule4 to communicate with a scalable nJAMS Cloud instance. On the other hand you may want to switch to a small on-prem instance of nJAMS Server during development and test of your Mule application. Depending on the purpose, you can switch the configuration of nJAMS Client for Mule4 easily.
If you prefer a scripted deployment of your Mule projects, you may want to have pre-defined nJAMS Client for Mule4 configuration files that can be rolled out along with your Mule applications according to the staging environment.
For this scenario, you can use the nJAMS Client for Mule4 configuration file njams.properties as you may already know from other nJAMS Clients.
Note
In case you have multiple configurations, only the configuration will be considered, where nJAMS Client for Mule4 is enabled.
Let us now go through the individual inline configuration options.
Create configuration#
Open your Mule project in Anypoint Studio and enter Global Elements:
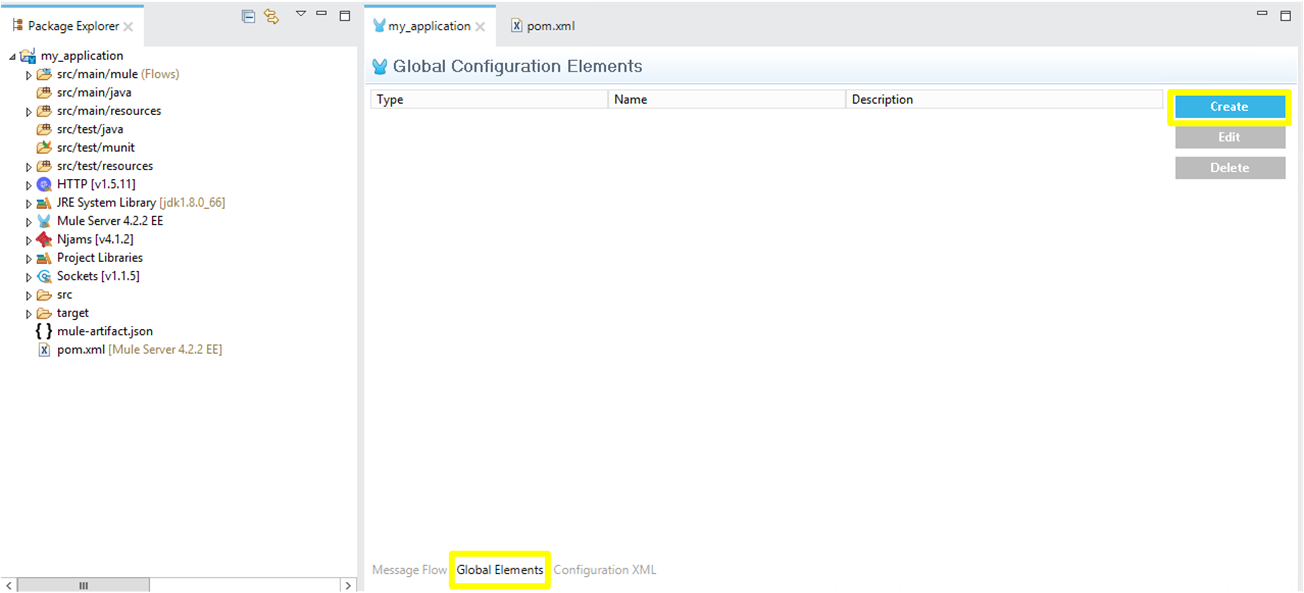
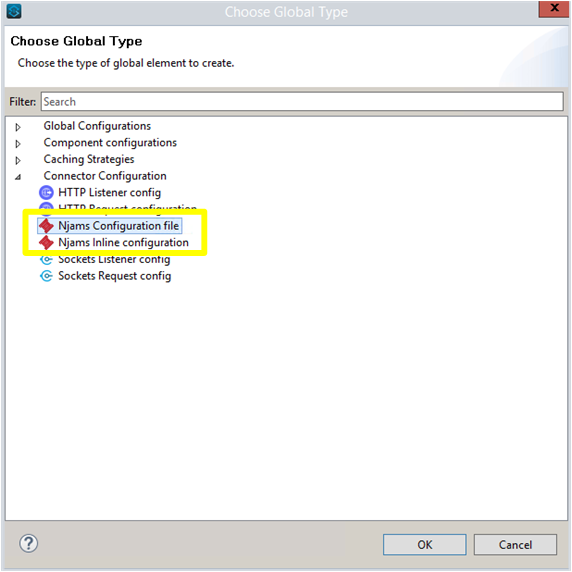
Click on Create and a new dialog pops up to choose the configuration type:
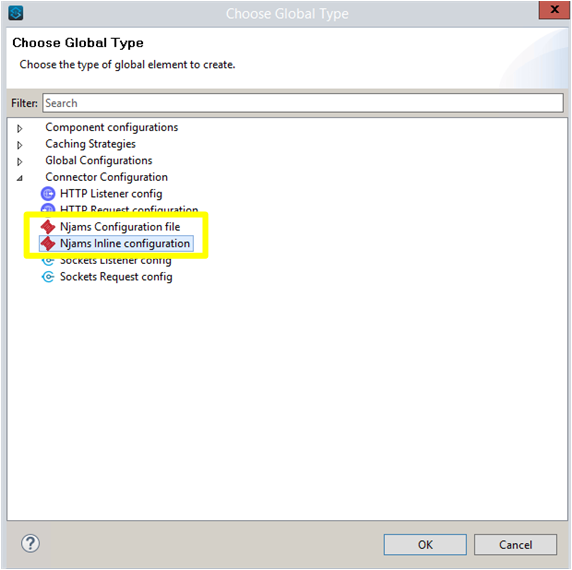
Select Njams Configuration file from category Connector Configuration, if you want to refer to a pre-defined configuration file. Refer to Configuration file to learn more about using nJAMS configuration file.
Select Njams Inline configuration, if you want to determine the configuration dialog-oriented. Read on, if you want to know more about this type of configuration.
General#
The general configuration determines basic settings of nJAMS Client for Mule4:
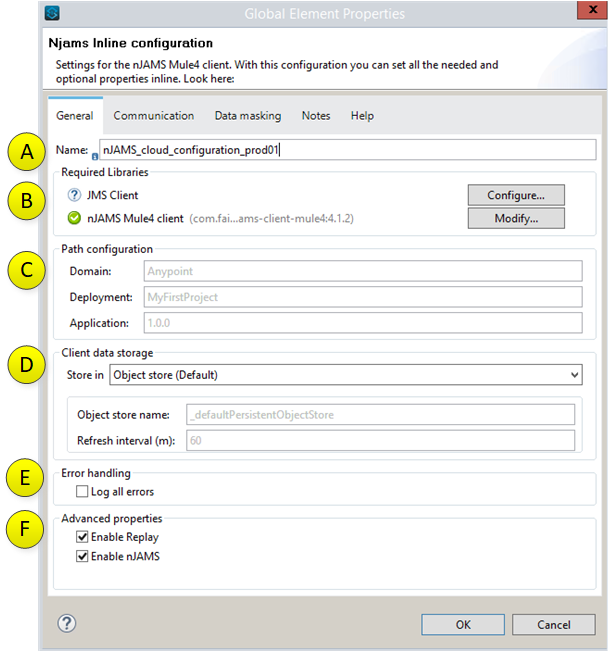
Enter a name for the configuration.
Select the JMS client library of your preferred JMS provider. This option is not required, if you go for nJAMS Cloud.
Path configuration allows you to determine the taxonomy of the Mule application in your nJAMS instance. You can specify individual names for Domain, Deployment, and Application under which the Mule application appears in the Domain Object Tree of your nJAMS instance. If you do not enter individual names, nJAMS Client for Mule4 will use default names.
The Client data storage specifies the place, where the application based nJAMS configuration is stored. This refers to the configuration, where nJAMS Client for Mule4 stores Extract definitions, whether Tracing is enabled/disabled, setting of LogLevel, etc.
- – Object store is the recommended storage location.
This setting stores the application based nJAMS configuration in the common Mule Object Store. You can specify an individual Object store name as well as the refresh rate that is used to frequently update the nJAMS configuration in the Object store.
– AWS S3 uses S3 storage to store application based nJAMS configuration. For using S3 you have to specify:
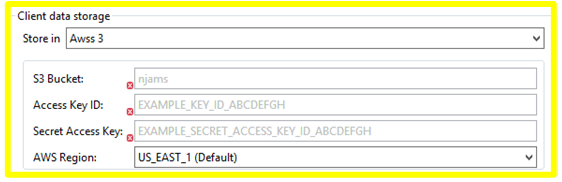
The name of your S3 bucket
Your access Key Id
Your secret Access Key
Enter AWS Region close to your location
- – Json file stores the application based nJAMS configuration into a JSON file of your choice on your local machine.
This option is only useful in designtime, when you are working with Anypoint Studio. In runtime environment, you should use the Object store.
- – Memory only temporarily stores the application based nJAMS configuration in memory.
After restarting Anypoint Studio, the nJAMS configuration is lost.
Error handling controls, when nJAMS Client for Mule4 should send error events.
trueautomatically creates error events for catched and uncatched exceptions.
falseautomatically creates error events only for uncatched exceptions (default).Advanced properties allow to enable/disable nJAMS Client for Mule4 within your Mule application, as well as enable/disable nJAMS Replay functionality of nJAMS Client for Mule4.
Communication#
On tab Communication you can specify how nJAMS Client for Mule4 communicates with your nJAMS instance. The communication is bi-directional. On the one side nJAMS Client for Mule4 sends log events to the nJAMS instance, on the other side nJAMS Client for Mule4 receives commands from the nJAMS instance in order to turn on Tracing, for example.
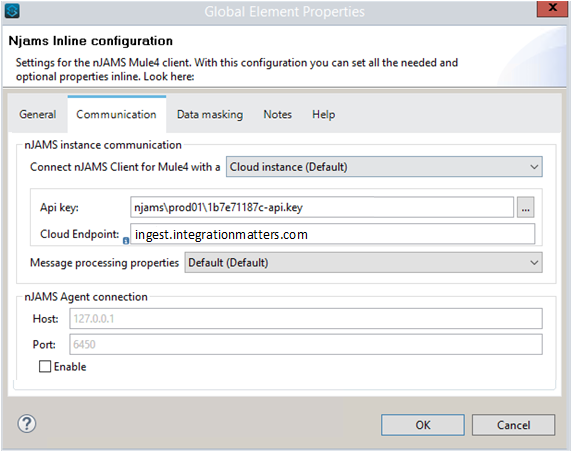
Select the communication target for nJAMS Client for Mule4:
Cloud instance is the default target.
Jms server uses a JMS provider to communicate with an on-premise nJAMS Server instance.
Depending on the selection, you will be prompted to enter additional settings.
With regards to Cloud instance:
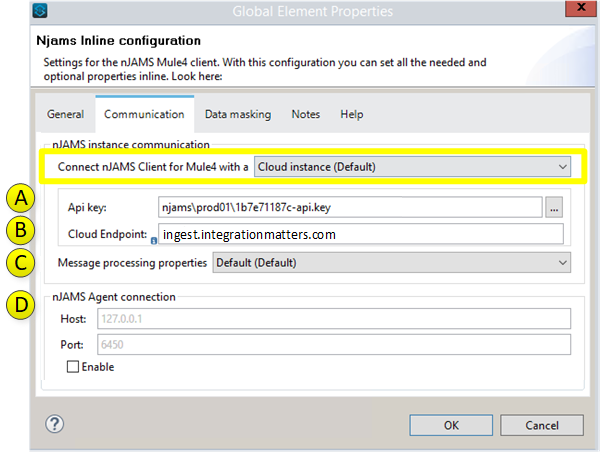
Using nJAMS Cloud instance requires to download the certificate package from your nJAMS Cloud instance and import the extracted files into a separate folder at
src/main/resourcesof your Mule project: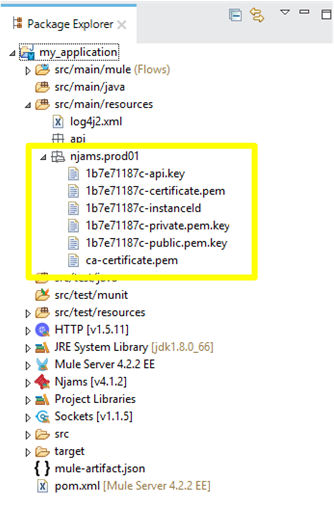
Select the API Key provided by your nJAMS Cloud instance.
The only available endpoint is
ingest.integrationmatters.com.Normally you can leave the Message processing properties as it is (default). If you want to optimize message processing according to your requirements, you can select Advanced and specify different options. Please refer to chapter Memory Management for more information about the configuration of message processing.
Enable/disable nJAMS Subagent of nJAMS Client for Mule4.
With regards to Jms server:
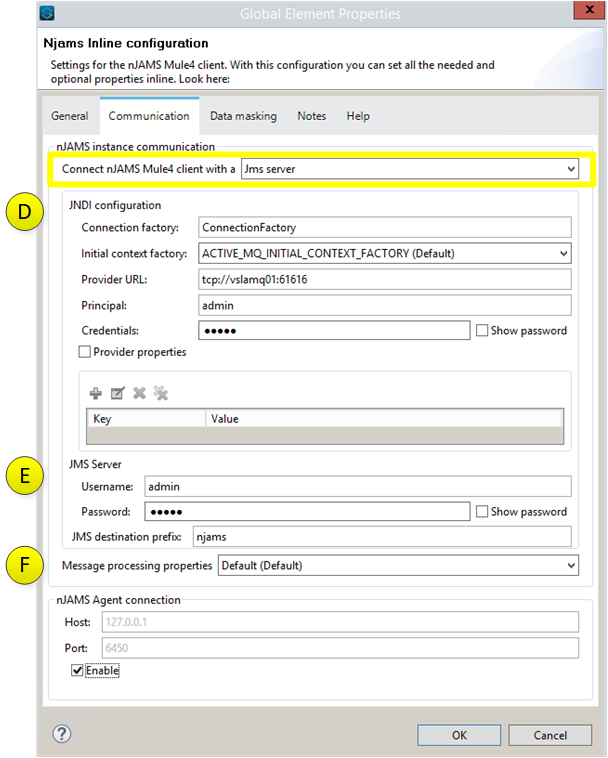
Make sure you already specified the JMS client library of your JMS provider as described before.
Enter JNDI configuration parameters of your JMS provider. You can select between two supported JMS providers so far:
ApacheMQ
TIBCO Enterprise Message Service
Enter credentials of your JMS server.
Select Advanced, if you want to control message processing of nJAMS Client for Mule4.
Data masking#
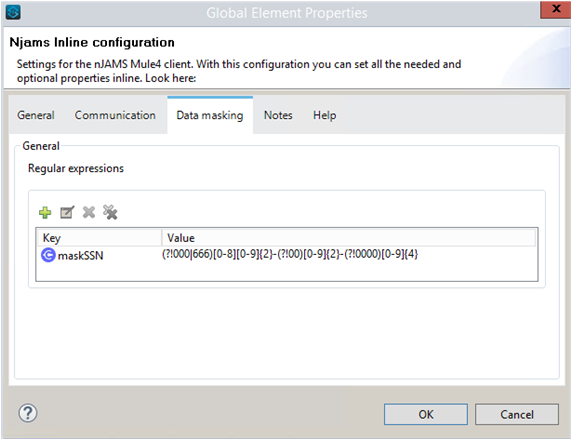
This option allows you to mask confidential data in the log message. Use a regular expression to specify a pattern for data masking.
For example, the following regular expression replaces any information that matches a Social Security Number with an asterisk character (“*”):
(?!000|666)[0-8][0-9]{2}-(?!00)[0-9]{2}-(?!0000)[0-9]{4}In the Data masking dialog enter a name and the regex:
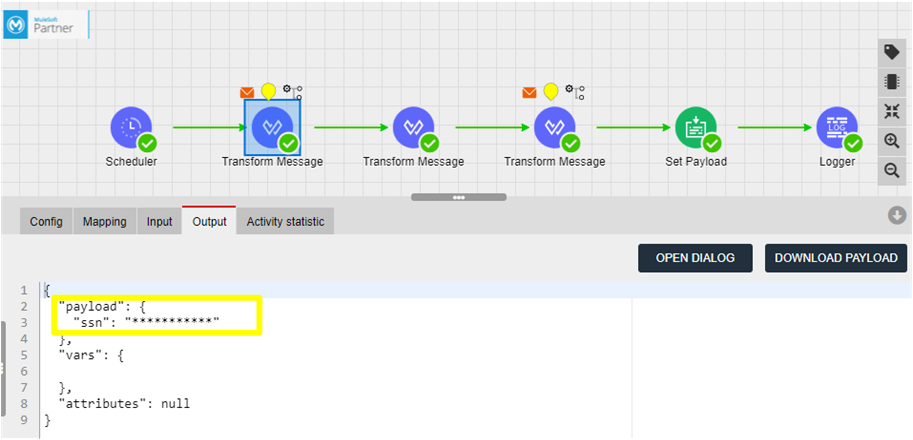
In nJAMS UI the Social Security Number is masked at each occurrence. For example, the occurence of a SSN in Trace Data will be masked as follows:
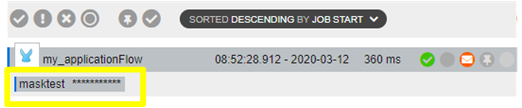
Also the outcome of an Extract will be masked correctly in the Result list:
Notes#
Make some notes with regards to the current configuration.
Run Mule application with nJAMS Client for Mule4#
nJAMS Client for Mule4 is now ready to monitor your Mule application.
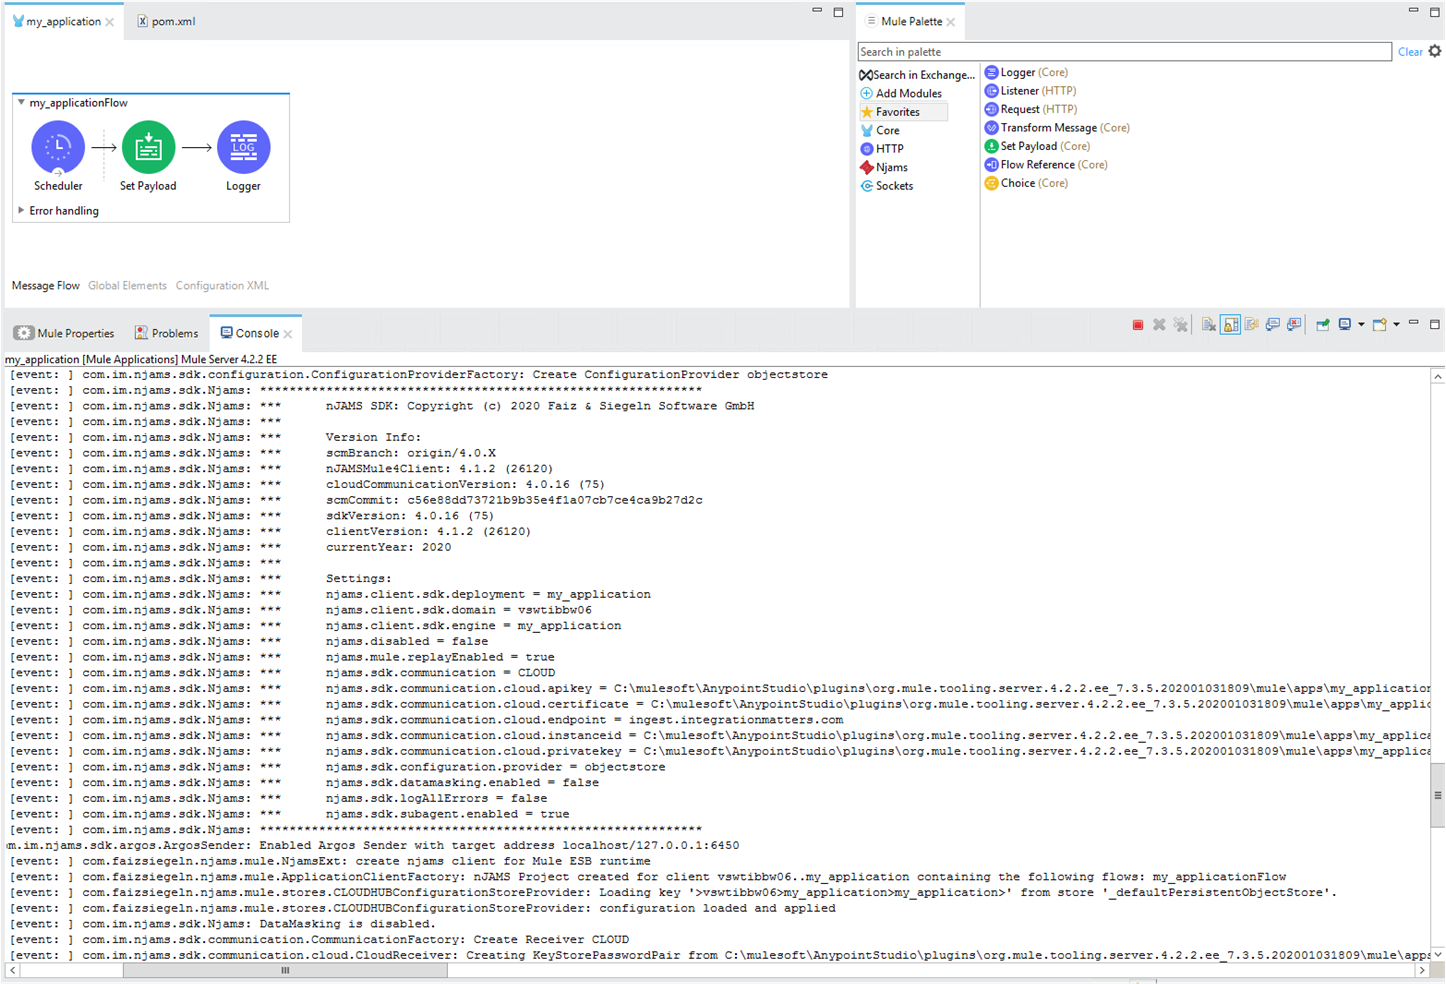
As a first test you can start your Mule application in Anypoint Studio. Go to tab Message Flow, right click on the pane and select Run project:

During the startup of your Mule application, nJAMS Client for Mule4 will also be initialized. See nJAMS Client for Mule4 banner text in console output:
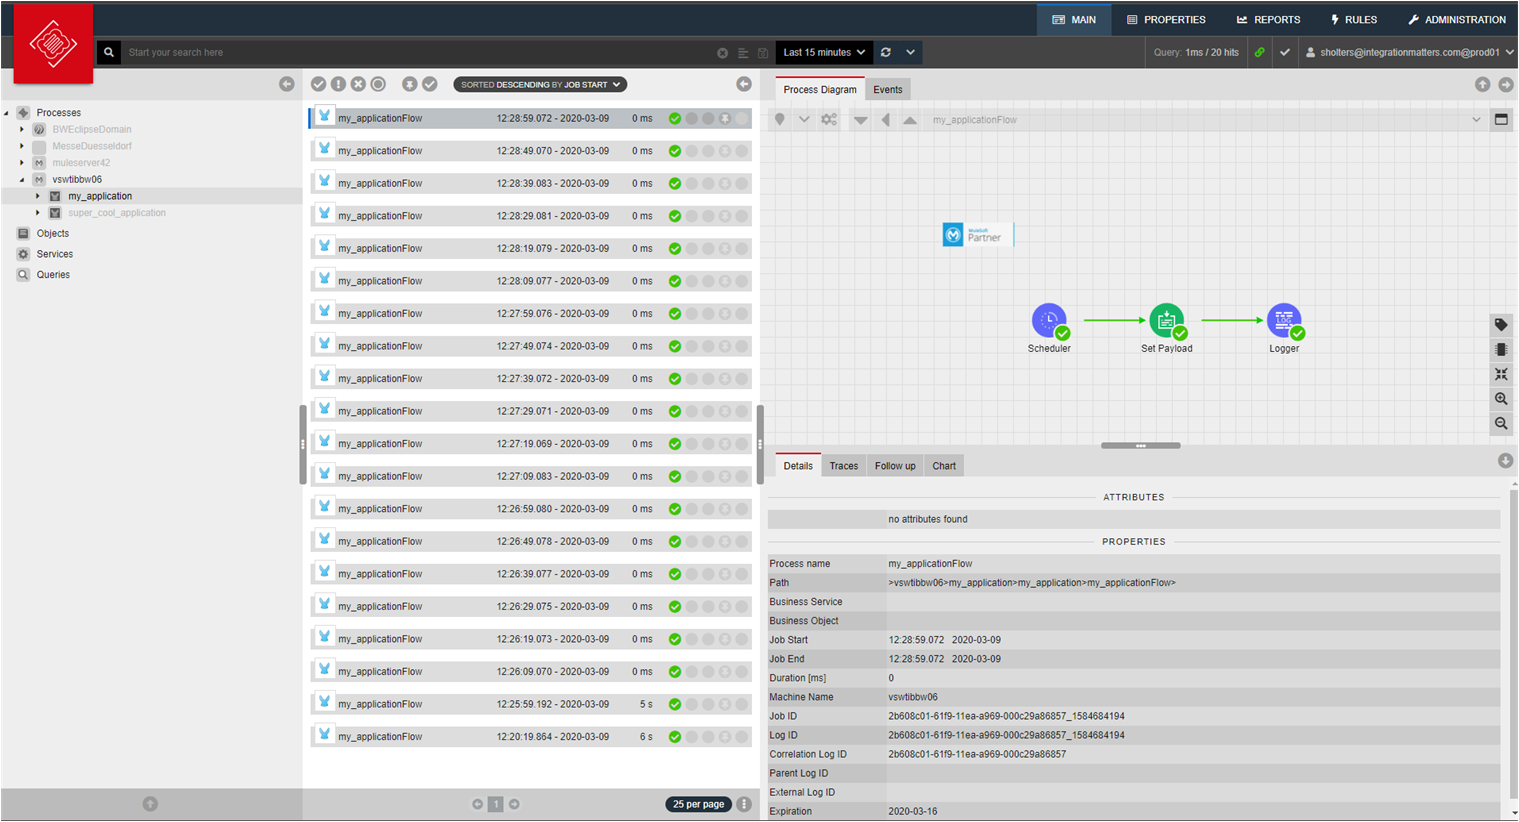
Enter your nJAMS instance and watch the results of each flow execution of your Mule application:
Configuration file#
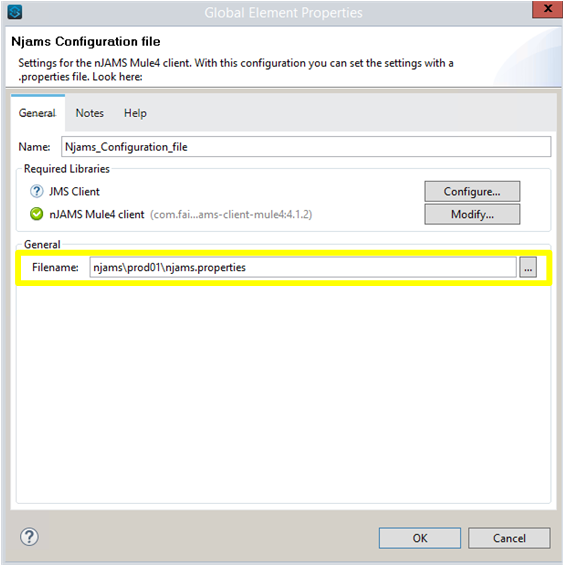
For using nJAMS configuration file in contrast to Inline configuration, as decribed before, you have to select Njams Configuration file from Connector Type list:
Create file njams.properties and save the file into a separate folder of resources within your Mule project.
In the following dialog you can enter the path to an existing njams.properties file:
Please find below a sample njams.properties file:
# Global settings:
njams.disabled = false
njams.mule.replayEnabled = true

# Communication Cloud:
njams.sdk.communication = CLOUD
njams.sdk.communication.cloud.apikey = /njams/prod01/1b7e71187c-api.key
njams.sdk.communication.cloud.certificate = /njams/prod01/1b7e71187c-certificate.pem
njams.sdk.communication.cloud.endpoint = ingest.integrationmatters.com
njams.sdk.communication.cloud.instanceid = /njams/prod01/1b7e71187c-instanceId
njams.sdk.communication.cloud.privatekey = /njams/prod01/1b7e71187c-private.pem.key
This sample configuration file configures communication with nJAMS Cloud and enables Replay and the Subagent.
Note
When you are using Mule RTF it is recommended to also configure the taxonomy in order to avoid getting new entries in the domain object tree each time you start the Mule application.
For example:
njams.client.sdk.domain=RTF-DEV
njams.client.sdk.deployment=my-process-api
For more details about configuration options, please refer to Reference: Client Configuration.