JMS#
JMS connections are referenced by the Data Providers. It is required to create at least one JMS connection. You may modify or delete existing JMS connections, or create new one. When selecting the JMS entry within the Connections category, a list of available connections is shown:
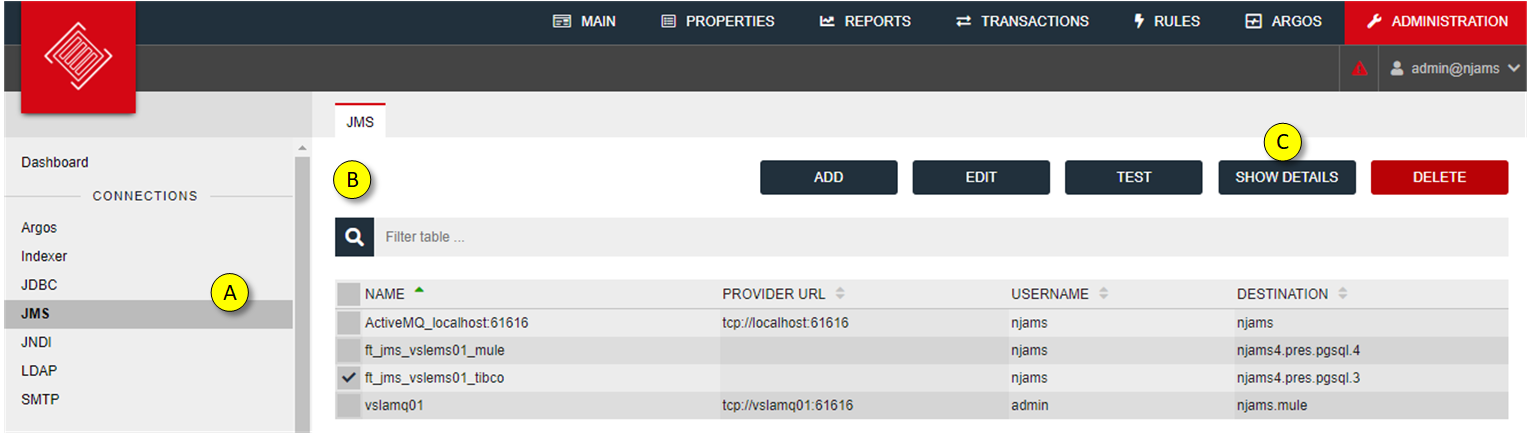
Select ‘JMS’ from Category Connections
List of configured JMS connections
Select an entry and you can see the details on the right hand side
- ADD, EDIT a JMS connection:
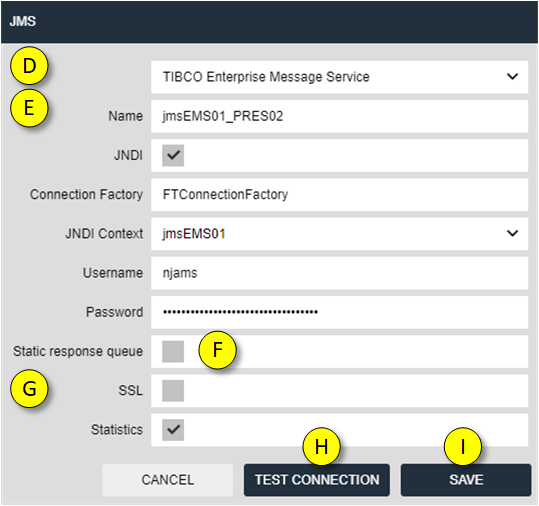
Select one of the available JMS providers from the list. By choosing “Others” you can enter individual parameters for any other JMS provider.
Specify the following information
Attributes
Description
Name
Name of the JMS Connection
JNDI
Activate this option, if you want to use JNDI
Connection factory
For JNDI specify the connection factory according to your JMS Server
Provider URL
For no JNDI enter URL of your JMS Server:
tcp://<servername>:<port>Username
JMS user account for nJAMS Server
Password
Password of the user
Note
If you want to use JNDI, you have to setup a JNDI context first. Afterwards you can specify this JNDI context within your JMS connection.
Enable fix response queues for communication with nJAMS Clients
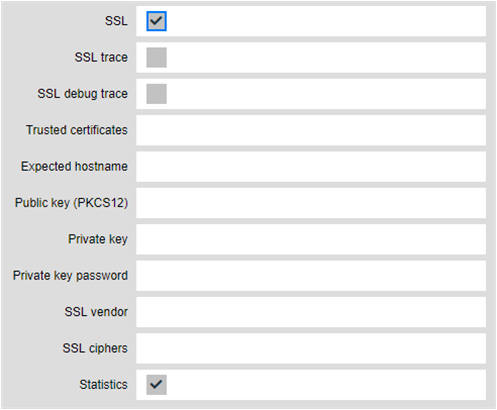
If the JMS connection should use SSL, the following properties require configuration
Attributes
Description
Use SSL
check, to open the SSL configuration. Please note: SSL encryption is only available for TIBCO EMS
SSL trace
check, to enable tracing when establishing an SSL connection
SSL debug trace
check, to enable more verbose tracing
Trusted Certificates
enter the path to a directory with trusted certificates (Note: remember that the path must be valid on the server’s host, not the local machine from where you access the web interface!)
Expected Hostname
If set, the returned server name will be matched against this value. If the expected hostname and returned hostname do not match, the connection will not be established. Default: check <disabled>
Public Key
Absolute path to the public key on the server’s host.
Private Key password
The password for the private key
Private Key
Absolute path to the private key on the server’s host.
SSL Vendor
The SSL vendor to use (default j2se)
SSL ciphers
The ciphers to use. Default: allow all.
Click on TEST connection to verify your connection.
If the connection could be established successfully, click on “SAVE”
To validate the settings made, press the “Test connection” button, at the bottom. Once the settings are validated, click on the “Save settings” button. “Cancel” discards all changes and closes the dialog.
- DELETE a JMS connection:
Select one or multiple JMS connections and click on DELETE to remove the selected connections.
Note
nJAMS Server will prevent you from deleting JMS connections with reference to an existing Data Provider. Stop and Remove the Data Provider first, before deleting the JMS connection.