OpenID Connect#
nJAMS Server allows to use authenticated sessions via identity providers that support OpenID Connect specification. When OpenID Connect is turned on, nJAMS Server can use authenticated sessions to allow login into nJAMS UI. This means nJAMS supports single sign-on via external identity providers.
You need an account at an identity provider, such as Azure AD, Google, Okta, etc. In addition, a user must be created in nJAMS Server whose username is identical to the account name at the indentity provider.
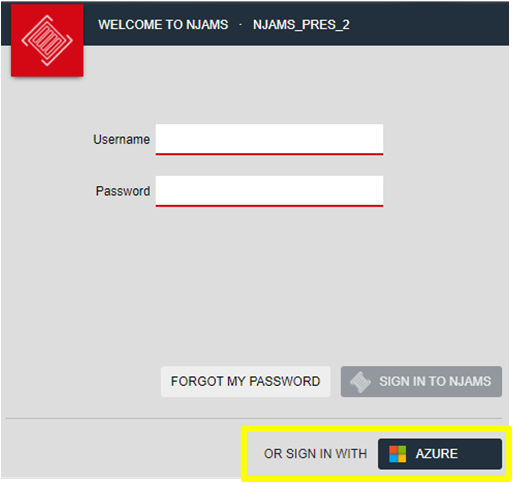
Once OpenID Connect is enabled in nJAMS Server, authentication can also be done via the external identity providers:
The following describes how to configure OpenID Connect in nJAMS for common identity providers.
auth0#
nJAMS Server can be configured to use auth0 for authentication. To do this you first have to register nJAMS application in auth0. When this is done you can configure nJAMS to use auth0 as authentication provider.
Follow these steps to register nJAMS in your auth0 account:
Login to auth0 management portal: https://manage.auth0.com
Register a new application at Applications:
Click on Create Application
Enter a name for the application, e.g. “nJAMS”
Select Single Page Web Applications and click on Create
Enter application URIs:
Select tab Settings of your newly created application
Scroll down to section Application URIs
Enter Allowed Callback URLs:
https://<njams-server-fqdn>:<port>/njams/assets/silent-check-sso.htmlEnter Allowed Web Origins:
https://<njams-server-fqdn>:<port>/njams/*Enter Allowed Origins (CORS):
https://<njams-server-fqdn>:<port>/njams/*Note
Although not recommended it is possible to use protocol
httpfor Application URIs:http://<ip-address>:<port>/njams/assets/silent-check-sso.html
Follow these steps to configure nJAMS for authentication using auth0:
Login as Administrator into your nJAMS Server instance
Go to Administration > OpenID Connect
Enter Provider URL. Use Domain from auth0 > nJAMS application > Basic Information, e.g.
<your-auth0-tenanat-name>.us.auth0.comEnter Application Client ID. Use Client ID from auth0 > nJAMS application > Basic Information.
Enter Secret. Use Client Secret from auth0 > nJAMS application > Basic Information.
Click Save and hit Activate to enable OpenID Connect
Azure AD#
nJAMS Server can be configured to use Azure AD for authentication. To do this you first have to register nJAMS web application in Azure AD. When this is done you can configure nJAMS to use Azure AD as authentication provider.
Note
Before you can register the nJAMS application in Azure, your nJAMS Server instance must be configured to use HTTPS. Please follow these instructions Enable SSL/TLS for WildFly to configure HTTPS for the WildFly Application Server of your nJAMS Server instance.
Follow these steps to register nJAMS in your Azure AD:
Login to Azure Portal: https://portal.azure.com
Register a new application at Azure AD > App registration:
Click on New registration
Enter a display name, e.g. “nJAMS”
Select desired account type
Select Single-Page-Application at Redirect URI
Specify Redirect URI as follows:
https://<njams-server-fqdn>:<port>/njams/assets/silent-check-sso.htmlDetermine impicit grant an hybrid flows at registered nJAMS app > Authentication:
Select ID tokens
Create a new Secret Client Key at registered nJAMS app > Certificates & secrets:
Enter any description and desired expiration time
Add claim to token at registered nJAMS app > Token configuration:
Add optional claim
Select type ID
Select email
Add the claim and select Turn on the Microsoft Graph email permission in the upcoming dialog
Follow these steps to configure nJAMS for authentication using Azure AD:
Login as Administrator into your nJAMS Server instance
Go to Administration > OpenID Connect
Enter Provider URL from Azure AD > App registrations > Endpoints > OpenID Connect metadata document, e.g.
https://login.microsoftonline.com/{tenantId}/v2.0/.well-known/openid-configurationEnter Application Client ID from registered nJAMS app > Overview > Application (client) ID
Enter Secret from registered nJAMS app > Certificates & secrets > Client secrets > Secret ID
Google#
nJAMS Server can be configured to use Google for authentication. To do this you first have to register nJAMS web application in Google. When this is done you can configure nJAMS to use Google as authentication provider.
Follow these steps to register nJAMS in your Google account:
Login to Google Cloud Platform: https://console.cloud.google.com/
Have a project or create a new project
Register a new app:
Go to API & Services > OAuth consent screen
Select External and hit Create
Enter an App name, e.g. “nJAMS”
Select a support email, enter developer contact information, and save
Add a scope:
Click on Add or remove scope
Select …/auth/userinfo.email from the list
Update and Save And Continue the scope
Create Credentials:
Go to API & Services > Credentials
Create Credentials and select “OAuth client ID”
Select Application type “Web application”
Enter a name, e.g. “nJAMS”
At Authorized JavaScript Origins click Add URI and enter:
https://<njams-server-fqdn>:<port>At Authorized redirect URIs click Add URI and enter:
https://<njams-server-fqdn>:<port>/njams/assets/silent-check-sso.htmlClick Create. Note the following information Your Client ID and Your Client Secret, which will be required in the configuration of OpenID Connect in nJAMS Server.
Follow these steps to configure nJAMS for authentication using Google:
Login as Administrator into your nJAMS Server instance
Go to Administration > OpenID Connect
Enter Provider URL:
https://accounts.google.com/Enter Application Client ID from API & Services > Credentials > registered nJAMS app > Client ID
Enter Secret from API & Services > Credentials > registered nJAMS app > Client secret
Click Save and hit Activate to enable OpenID Connect
okta#
nJAMS Server can be configured to use okta for authentication. To do this you first have to register nJAMS web application in Google. When this is done you can configure nJAMS to use okta as authentication provider.
Follow these steps to register nJAMS in your okta account:
Login to your okta account: https://login.okta.com>
Go to Administration
Register new app:
Go to Applications > Create App Integration
Select Web Application
Enter an App Integration name, e.g. “nJAMS”
Enter Sign-in redirect URI:
https://<njams-server-fqdn>:<port>/njams/assets/silent-check-sso.htmlNote
Although not recommended it is possible to use protocol
httpfor Application URIs:http://<ip-address>:<port>/njams/assets/silent-check-sso.htmlRemember Client ID and Client secret for upcoming steps
Click on Edit at General Settings
Select Application / Grand type: Implicit (hybrid) and Allow ID Token with implicit grant type
Add Identity Provider:
Go to Security > Identity Providers
Add Identity Provider: Add OpenID Connect
Enter name, e.g. “nJAMS IdP”
Enter Client ID and Client secret from previous step (3)
Enter Issuer:
https://<your-okta-account>.okta.comEnter
https://<your-okta-account>.okta.com/oauth2/v1/authorize/callbackfor Authorization endpoint, Token endpoint, and JWKS endpointClick Add Identity Provider
Assign users to Application:
Go to Applications > Applications > Assign Users to App
Follow these steps to configure nJAMS for authentication using okta:
Login as Administrator into your nJAMS Server instance
Go to Administration > OpenID Connect
Enter Provider URL:
https://<your-okta-account>.okta.comEnter Application Client ID from Applications > registered nJAMS app > Client ID
Enter Secret from Applications > registered nJAMS app > Client secret
Click Save and hit Activate to enable OpenID Connect
Others#
nJAMS Server basically supports any OpenID Connect (OIDC) compliant identity provider. Follow the instructions of your identity provider to register the nJAMS application and create the credentials. Then enter Provider URL, Client ID, and Secret in the OpenID Connect configuration of nJAMS Server.