Rules#
nJAMS Server provides the configuration of monitoring rules, which can trigger various actions. For example, a Service Owner may want to get email alerts whenever a certain process execution time, or an individual activity, exceeds a given threshold.
Creating and configuring Rules requires administrator or rules_manager system privilege.
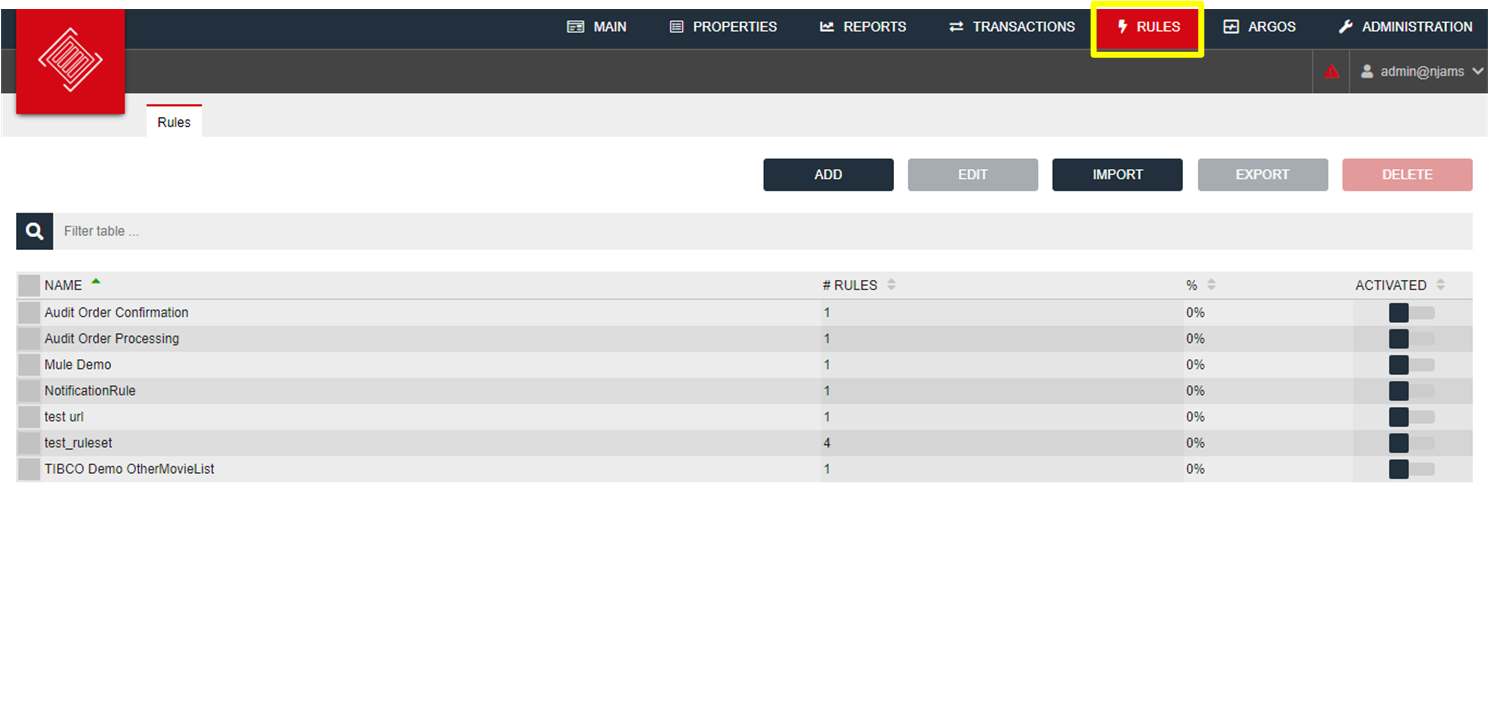
Rules can be configured and managed on the “Rules” page:
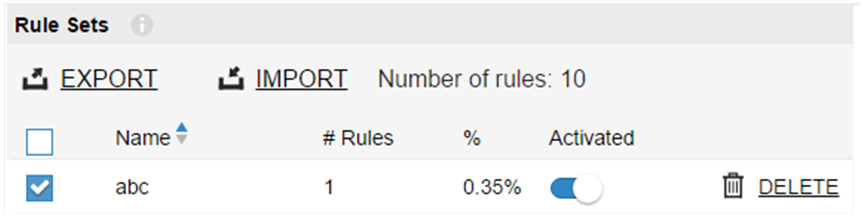
The left part of the page lists existing Rulesets and allows to administer Rulesets:
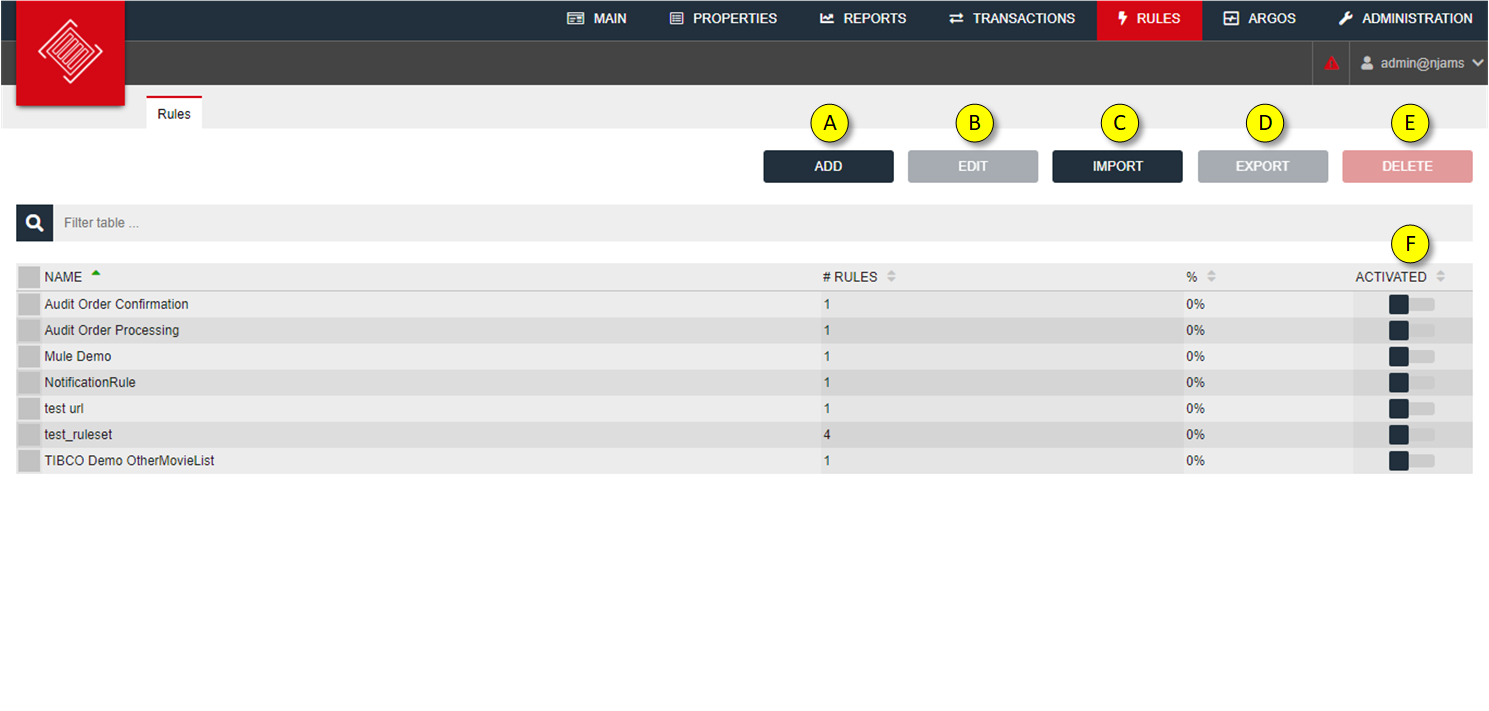
EXPORT a Ruleset
IMPORT a Ruleset
CREATE a new Ruleset
DELETE a Ruleset
After clicking on a Ruleset you are directed to the details page of the Ruleset:
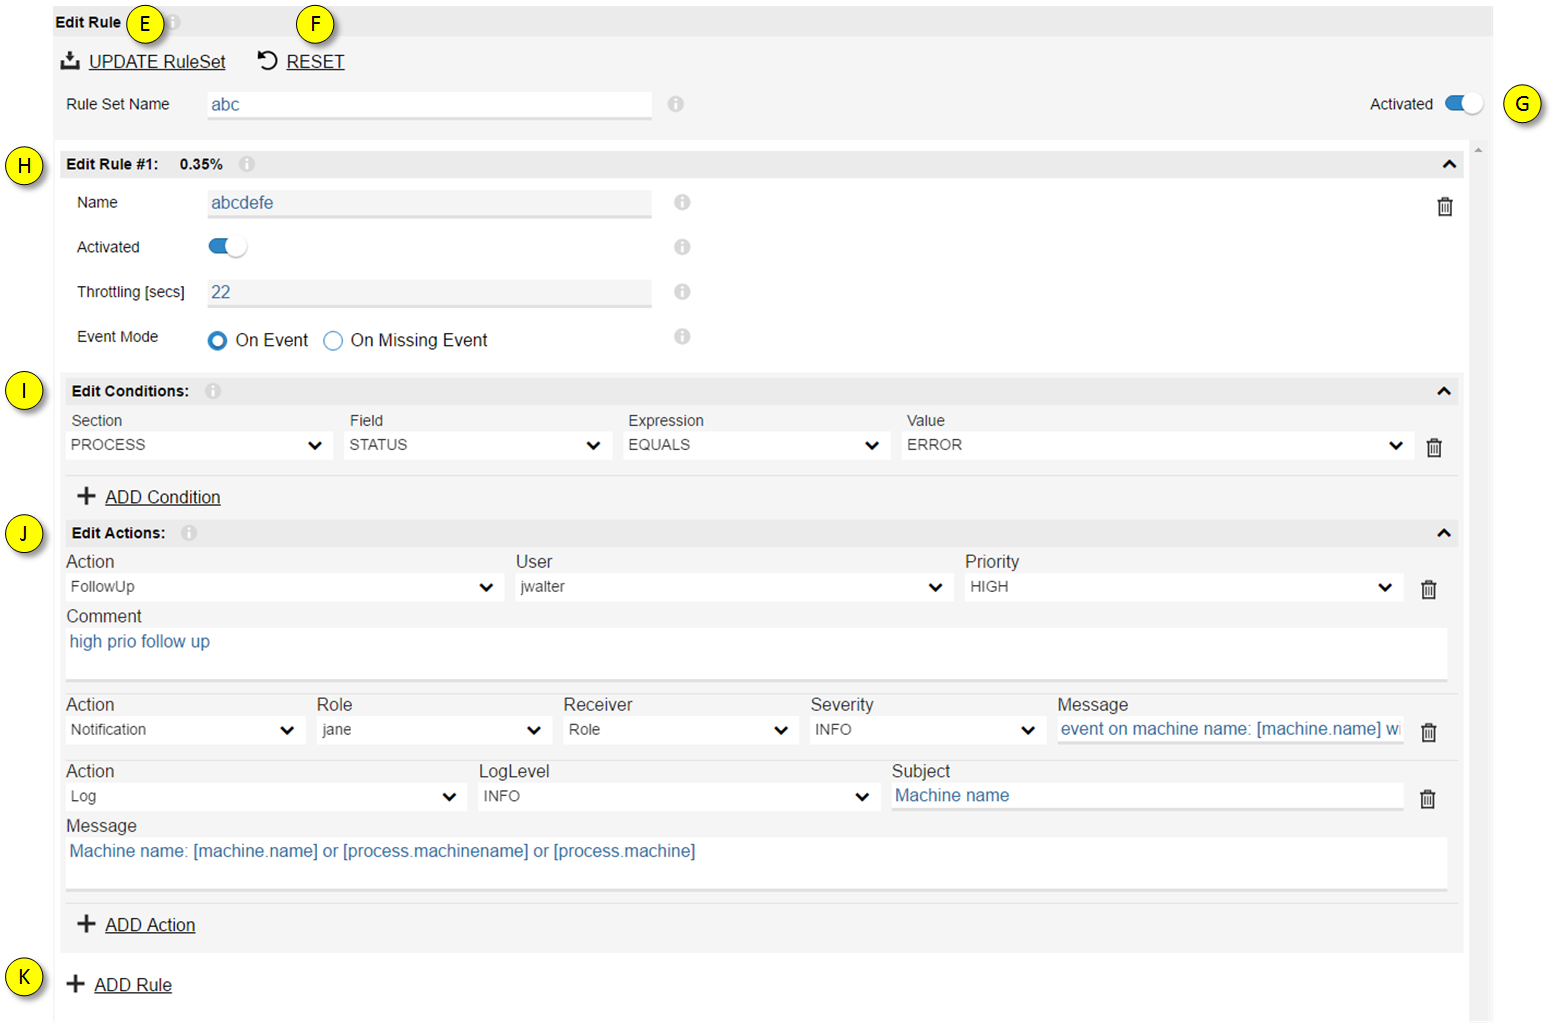
UPDATE Ruleset saves changes to the Ruleset
RESET discards changes to the Ruleset
Activates / deactivates a Ruleset. A deactivated Ruleset
Edit Rule allows to configure a Rule of a Ruleset. A Ruleset may consist of multiple Rules. A Rule can also be activated/deactived within a Ruleset. The given percentage represents the proportion of the number of matches of this Rule in contrast to the total number of occurring events. That proportion may give you a hint about how busy.
Add, Edit and Delete the conditions of a Rule.
Add, Edit, and Delete the actions of a Rule.
Add a new Rule to the Ruleset.
Add a new Ruleset#
Assume you want to get notified, if the “Order Processing Service” sends warning or error events. For this scenario you have to follow 4 steps:
Create a new Ruleset
Create a Rule to the Ruleset
Add two Conditions to the Rule. The first checks for Events of the particular process, the second checks for the status of the Events.
Create an Action to the Rule that generates a FollowUp in case the Conditions match.
To add a new Ruleset click on ADD Ruleset. A new blank Rule page opens:
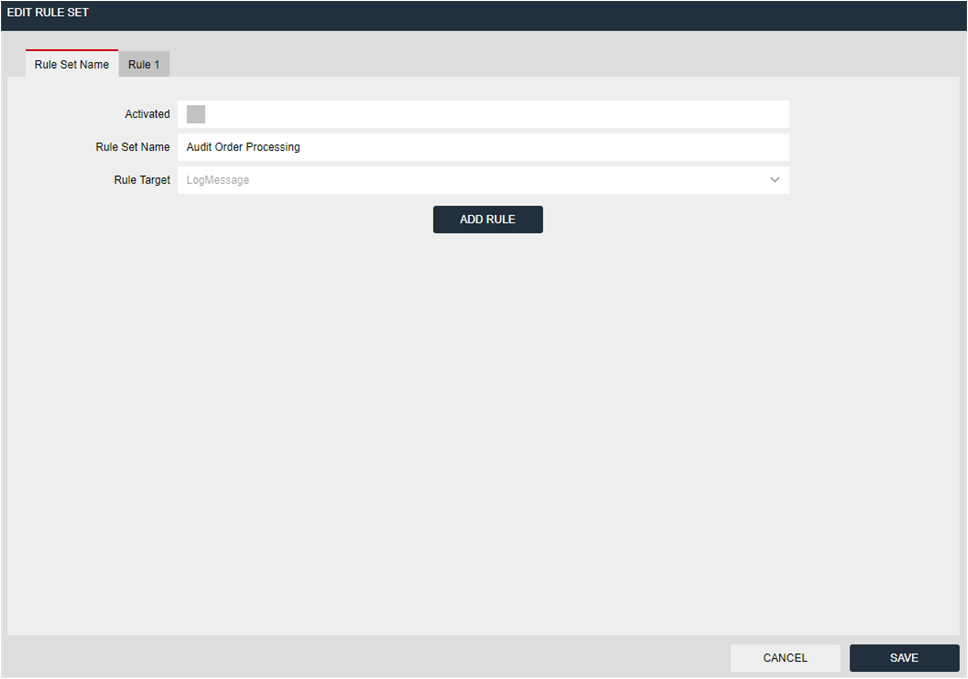
You can now specify a name for the Ruleset and create the first Rule:

Enter a name for the Ruleset
Click on ADD Rule to create a new Rule for the Ruleset
Enter details for the new Rule:
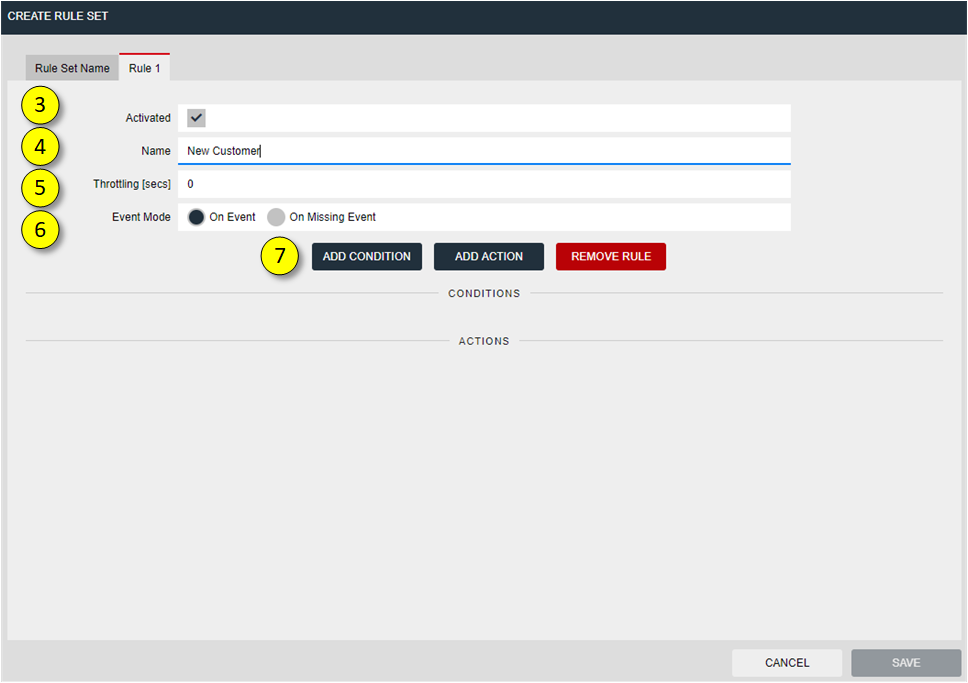
Enter a Name for the Rule
Activate the Rule
Throttling allows to throttle the execution of a Rule. To use throttling enter a value greater 0. Throttling means there will be an adjustable delay before the next action is fired by a rule. For example: assume a rule constantly fires an action to send emails, but you do not want to get flooded with a huge number of needless emails. You only want to get one email to get notified about an alarming situation. In that case you can raise the value for throttling. If you configure throttling to 5 minutes, the rule only fires an action every 5 minutes, when the conditions are (still) true. If throttling is 0, the rule fires an action each time the conditions are true.
Event mode allows to act either on incoming Event or on missing Event. Missing Event means a Rule will act, if a specific Event does not occur.
Click on ADD Condition to create one or more conditions for the Rule.
Enter Condition parameters to the Rule:
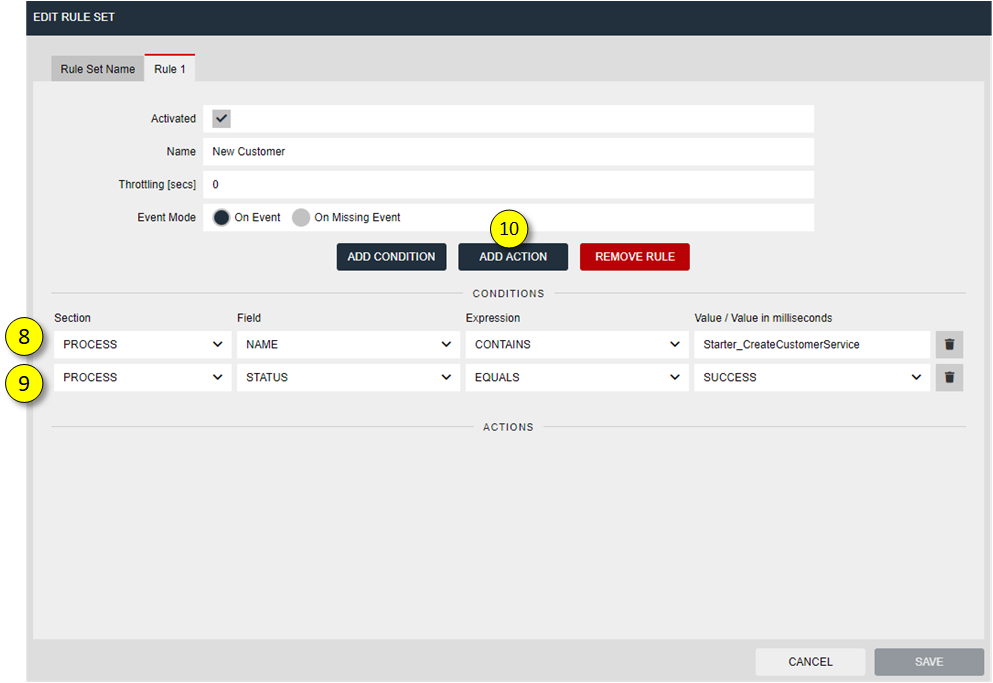
Enter a first condition that checks for Events of the process “Starter_OrderProcessingService”.
Enter a second condition that checks for the status of the Events of the process that is greater than SUCCESS. There is a rank order of the status: 0-running, 1-success, 2-warning, 3-error.
Click on ADD Action to create an Action to the Rule.
Enter the Action to the Rule:
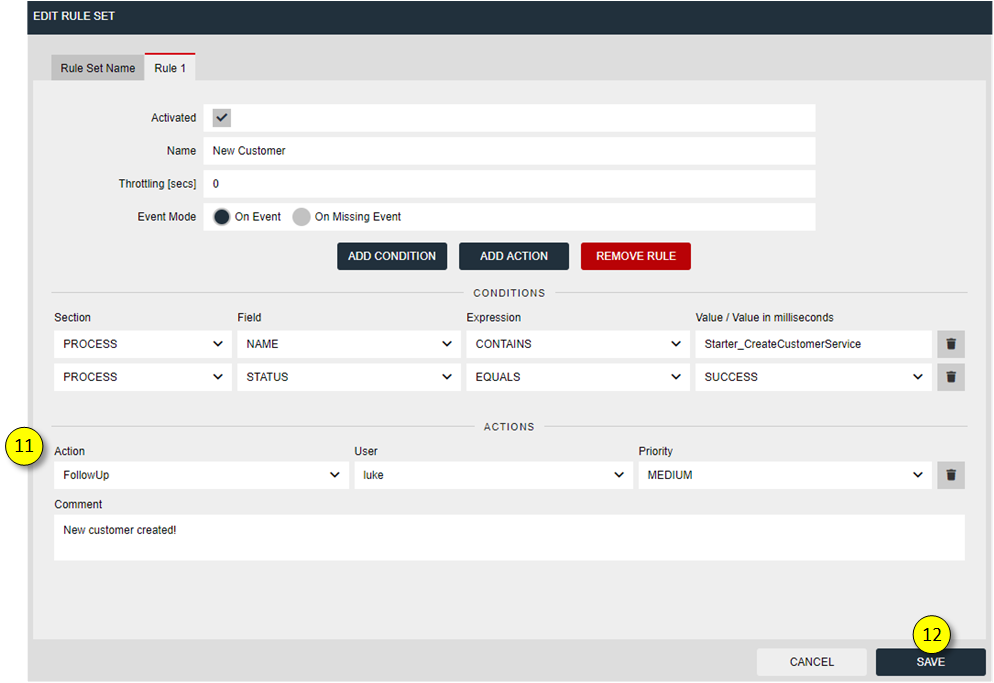
Enter Action type “FollowUp”, address a user for the FollowUp, and specify priority. A comment gives some more useful details.
Click on SAVE new Ruleset.
Editing Conditions#
The following combination of object and attribute are available:
Object
attribute
Attribute type
Valid values
Activity
EventStatus
EventCode
EventMessage
Input
Name
Output
EventPayload
EventStacktrace
Duration
String
String
String
String
String
String
String
String
Number
The event’s status name. Valid values are: “INFO”, “SUCCESS”, “WARNING”, “ERROR”
Any string Example: “ORA-01417”
Any string Example: “A table may be outer joined to at most one”
Any string regarding input data of activity
Any string Example: “LogInfo”
Any string regarding output data of activity
Any string Example: “OrderNo: A426398”
Any string Example: NullPointerException
Any number. The attribute’s value is in milliseconds.
Attribute
<name of attribute>
Number | String | Date
The exact name of the attribute, as defined in an extraction rule. Example: “OrderId”
Process
Name
Status
Object
Service
ExternalReference
Machine
Path
Duration
String
String
String
String
String
String
String
Number
Any string. To match exactly one process definition, the full URI of the process should be used. Example: “DemoFolder/DemoProcess.process”
The process’ status. Valid values are: “INFO”, “SUCCESS”, “WARNING”, “ERROR”
Any string Example: “Order Confirmation”
Any string Example: “Order Service”
Any string Example: “A119764”
Any string Example: “vsltibbw01.domain.com”
Any string “Example: >Domain>Application>Engine>”
Any number. The attribute’s value is in milliseconds.
The following comparators are available for the different attribute types:
Attribute type
Comparators
String
equals, not equals, contains, not contains, starts with, starts not with, ends with, ends not with
Number
equals, not equals, greater than, greater or equal, less than, less or equal
Date
after, before
Editing Actions#
Whenever all conditions of a rule are matched, the server triggers all actions configured for that very rule. The following actions are available:
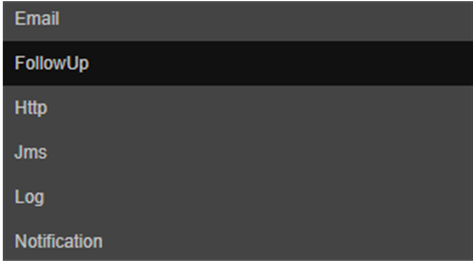
- Email Action:
The email action is configured using the following five (optional) fields: to, cc, bcc, subject and message body. An example configuration could be as follows:

Note
Before Email actions are configured, please validate that an email server has been configured in
Administration -> Connections -> SMTP. Otherwise the system will not be able to send emails.Available settings for mail action:
Setting
Description
Example
To
List of email addresses to send this email to. Separate addresses using the semicolon (“;”)
cc
List of email addresses to copy this email to. Separate addresses using the semicolon (“;”)
Bcc
List of email addresses to blind copy this email to. Separate addresses using the semicolon (“;”)
Subject
The subject of the email
“Notification email”
Message
The email’s body
“The process took longer than expected!”
The email action does not support email attachments.
- FollowUp Action:
To mark a process instance for follow-up, the FollowUp action can be used. It will create a new FollowUp, associate the current evaluated process instance with it and assign it to the configured user.

Available settings for Create FollowUp action:
Setting
Description
Example
Task name
The name of the task to appear in the user’s task list.
“Generated Task for [process.logid]”
User
Select one of the available users to assign this FollowUp to.
“Admin”
Priority
Defaults to medium. Select any of these priorities: “low”, “medium”, “high”. Priorities can be used by users to sort their task list.
“medium”
Comment
A free text comment to append to the task.
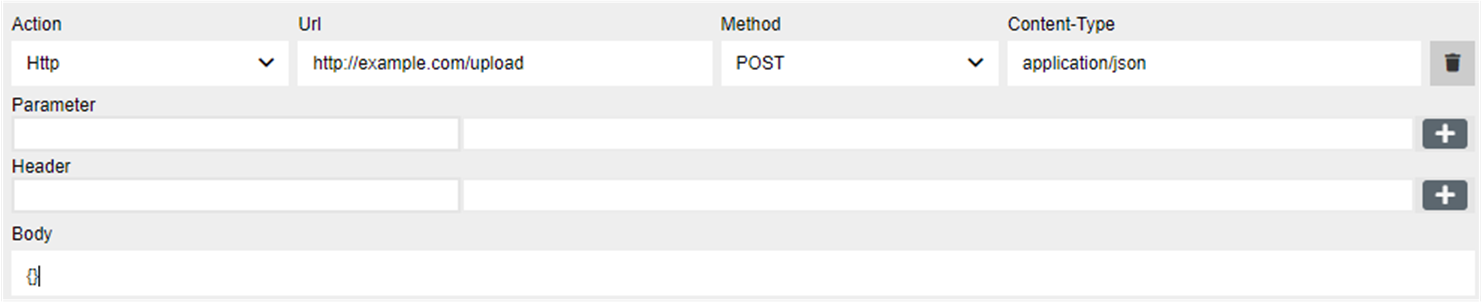
- HTTP Action:
Send a request via HTTP or HTTPS to allow an external application to process specific information.
Description of available settings for Log action:
Setting
Description
Example
URL
HTTP or HTTPS Host machine name TCP Port
Method
HTTP Method One of: GET, POST, PUT, DELETE
GET
Content-type
Message content type
application/xml
Parameter
parameter containing information from the message
process=[process.name]
Due to fact that the request will be send asynchronous, the status code and the response will not be observed.
- JMS Message Action:
The JMS Message action sends a JMS text message to a configurable destination. The destination and message body can be freely configured; the JMS connection used for sending the message, however, must be selected from the list of configured JMS connections.

Description of available settings for JMS Message action:
Setting
Description
Example
JMS Connections
The JMS connection to use for sending the message. JMS connections can be configured in
Administration -> Connections -> JMS” category.“jmsQueueConnection”
New Message
Choose between creating a new (text) message, and sending a copy of the retrieved log message to the new destination.
“New”
Destination Type
Enter either “Queue” or “Topic”
“Queue”
Destination Name
The JMS destination name to send this message to
“new.destination”
Message Body
Only available, when “New” Message is selected. Defines the text body of the JMS message.
“Hello world!”
Note
The JMS Message action does not support configuration of JMS headers.
- Log Action:
The Logging Action allows you to log to a file that can be processed by an external tool.

Description of available settings for Log action:
Setting
Description
Example
Log Level
One of the following log levels: TRACE, DEBUG, INFO, ERROR, WARN, OFF
“INFO”
Subject
A short keyword to simply identify the log entry
“[process.name]”
Message
Message body
“process [process.name] took [process.duration] ms”
- Templating language:
For all settings that allow free text entries, such as email address, message body or FollowUp comment, a templating language is available. This allows to dynamically insert content into the concrete field at runtime, such as process names, activity durations and other.
Text strings that should be replaced when the action is triggered must be enclosed using square brackets (“[“ and “]”). For example, to insert the name of the process into the email message body, the following text can be used: “The process name is: [process.name]”. At runtime this will result into, for example, this: “The process name is: DemoFolder/DemoProcess.process” A valid token consists of two parts: the object and its attribute, and is of this format: [object.attribute].
The following table lists all available objects and attributes combination:
Object
Attribute
Description / Returned value
activity
cputime duration eventcode eventmessage eventpayload eventstacktrace eventstatus execution input name output sequence subprocess.logid subprocess.name subprocess.path
used CPU time elapsed time Event code text Event message text Payload Stacktrace Status code Execution of activity Input data The exact name of the activity Output data Sequence number LogId of the sub process Name of the sub process Path of sub process
attribute
name value
Name of the Attribute Value of the Attribute
process
clientversion
correlationlogid
duration
externallogid
jobend
jobid
jobstart
logid
machine
maxSeverity
name
object
parentlogid
path
service
status
The full process URI of the executed process. Example: DemoFolder/DemoProcess.process
The correlation id for this process instance.
The duration of the job in milliseconds.
The configured external reference for this process. Example: “4711”
The timestamp of the job termination. Example: “2018-10-01 23:42:37”
The job id for this instance.
The timestamp of the job start. Example: “2018-10-01 23:42:37”
The unique identifier for this process instance
Name of the machine
Highest severity of all events for this process
Name of the process
The specified business object for this process Example: ‘Order’
The unique id of the parent (or calling) process.
The specified business service for this process. Example: “Order Service”
The process status. Valid values are: “INFO”, “SUCCESS”, “WARNING”, “ERROR”
Note
All tokens are case sensitive! All settings listed above must be used in lower case with the exception of <name of activity> and <name of attribute> that follow the capitalization as defined in the process implementation and in the extraction rule.
Export a Ruleset#
You can export a Ruleset to a JSON file:
Select the Ruleset you want to export
In the upcoming Browser dialog you can specify where to export the JSON file on disk.
The Ruleset JSON file can be modified manually, if applicable, and imported into a different nJAMS instance.
Import a Ruleset#
You can import a Ruleset by clicking on IMPORT.
Click on IMPORT
In the upcoming Browser dialog select a Ruleset JSON file
If importing of the Ruleset was successful, a Toast message will pop up:
